GolfBays

BLOGS GOLF BAYS

Analyses approfondies de produits, conseils sur les boîtiers et simulateurs, et bien plus encore…

AFFICHAGE DE 1 À 9 SUR 77 ENREGISTREMENTS

New for 2026 at GolfBays: The Latest Launch Monitors Worth Your Attention

April 14, 2026

By Malek Murison

New for 2026 at GolfBays: The Latest Launch Monitors Worth Your Attention

If you’ve taken a peek into the world of golf simulators lately, you’ll know the experience can unravel fairly quickly. One minute you’re comparing Garmin with SkyTrak. The next, you’re thirteen tabs deep exploring spin axis, launch angle, software subscriptions and whether your garage can double as a performance studio. But big news! 2026 has so far delivered a couple of launch monitors that suggest the market is getting better at separating simple practice tools from more advanced simulator systems, which is great for anyone who wants useful feedback without needing a degree in ball flight. In this guide, we are looking at the newest launch monitors launched in 2026 and now available at GolfBays, breaking down what each one does well, where it fits, and who it’s really for. A New Entry-Level Launch Monitor: The Shot Scope LM1 The Shot Scope LM1 is a great addition to our range of entry-level launch monitors this year. It’s a compact Doppler radar unit built around five core metrics: clubhead speed, ball speed, smash factor, carry distance and total distance. That data appears on a 3.5-inch colour display, with simple button navigation, Bluetooth syncing, speed training mode, and no subscription required to review session history in the Shot Scope app.  It’s designed for indoor and outdoor use thanks to its IPX3 rating, and runs for around five hours on a full charge. What makes the LM1 especially appealing is that it does not try to dress itself up as something it isn’t. For a great price, it gives you feedback that actually helps you practise with intent: how fast you are swinging, how efficiently you are striking it, and whether your carry numbers are where you think they are. With the built-in screen, you can see your data there and then, without constantly reaching for a phone or tablet between shots, which makes practice feel more like practice (and less like admin.) From a setup point of view, the Shot Scope is pretty low-fuss. Position it 1.4 metres behind the ball and swing away. The whole package is built around portability and ease of use, which suits players who want a bit of flexibility between range sessions, garden nets, and more.  This is not the launch monitor you buy for deep spin analysis, club delivery detail or simulation-heavy use. It’s a streamlined practice tool, with straightforward speed and distance feedback, quick setup, and enough consistency to make club comparisons, distance checks and structured practice sessions genuinely useful.  A New Middle Ground Contender: The Square Golf Omni The Square Golf Omni is one of the more interesting 2026 releases because it takes camera-based ball tracking into a price bracket that usually comes with more compromise. Square positions it as an indoor and outdoor launch monitor, and the core spec explains why it stands out: four-camera infrared tracking, a built-in display with key ball and club metrics, a larger hitting area, and no need for marked balls.  This new launch monitor is clearly aimed at golfers who want more than entry-level feedback without leaping straight into premium launch monitor pricing. The Omni is trying to solve a very practical problem. A lot of golfers want one monitor that can handle a home sim setup during the week and range sessions or outdoor practice when the weather behaves itself. Square has built the Omni with that in mind. It is designed to be set up on a flat surface opposite the ball, used indoors or outdoors, and connected via Bluetooth to Square’s software when you want a fuller simulator or practice experience. The data offering is also a step up from the simpler end of the market. You can expect a full spread of ball data including ball speed, direction, launch angle, backspin, sidespin, spin rate, spin axis, apex, carry, run, total distance, landing angle and offline distance. On the club data side, it includes club path, face to target, attack angle, dynamic loft, impact horizontal, impact vertical, club speed and smash factor. In other words,  enough detail to make the Omni genuinely useful for more serious practice, distance work and ball-flight analysis. That extra club data is a big part of the Omni’s appeal. It gives you a clear picture of what happened through impact, which matters when you are trying to understand strike quality, face delivery or why one shot differs wildly from another.  The software side is well judged too. Out of the box, Square includes no subscription fee, 1,000 free golf course credits, and access to its own software across Driving Range, Closest to the Pin, Putting and Golf Course modes. It also supports third-party platforms including GSPro, E6 Connect and Awesome Golf.  The Omni’s strength is that it lands in a very usable middle ground. It gives you the indoor-friendly nature of photometric tracking, the flexibility to go outdoors, and enough club and ball data to make a proper simulator build or structured practice setup feel worthwhile. It is not trying to be the cheapest option in the room, and it is not pretending to be a tour-level fitting system either.  Think of it as a practical launch monitor for golfers who want more insight and more flexibility. Looking Ahead 2026 has not reinvented the launch monitor (yet!). What it has done is make the category easier to navigate. At one end, entry-level devices like the Shot Scope LM1 show that simple practice data can now be genuinely useful, rather than feeling like a watered-down version of something better. At the other, launches like the Square Golf Omni show how much more flexible and capable mid-range systems are becoming, especially for golfers building indoor setups. For most golfers, that matters more than a longer feature list. So, What’s On The Golf Simulator Horizon? The launch calendar for new golf simulators looks pretty quiet up ahead. The Shot Scope LM1 and the Square Golf Omni are both rolling out this spring, and beyond that, the IDRA Pro is expected sometime later this year. If recent releases are anything to go by, indoor and outdoor flexibility, quicker setup, built-in displays, and stronger software integration are the order of the day. In other words, the market is getting better at producing launch monitors that fit the way golfers really practise and play. We'll keep this post updated with any more 2026 releases! 
Golf Simulator Bundles vs Buying Piece-by-Piece: The Fastest Route to a Playable Setup

March 30, 2026

By Malek Murison

Golf Simulator Bundles vs Buying Piece-by-Piece: The Fastest Route to a Playable Setup

If you’ve ever looked at building a golf simulator by buying everything separately, you’ll know the feeling: you start with a launch monitor and a dream, and before you know it, you’re deep down a rabbit hole of screens, mats, projector specs, software... with a growing suspicion that you’re still missing something important. At the end of the day, a playable setup is the goal. Simulator bundles and packages exist to make your life easier.  Can’t decide between a golf simulator package and a complete DIY setup?  Bundles and packages are your best bet if you want the fastest route to a setup you can use, see your shots, and trust what you’re looking at. No working out compatibility or figuring out complex setups. Just virtual golf, at your fingertips.  Piece-by-piece can work if you already own key components, you know exactly what fits your space, or you’re happy spending time (and usually a little more money) getting a truly tailored setup.  The thing you want to avoid is going down the DIY rabbit hole and just ending up building a bundle… but slower. Here are a few quick shortcuts to get you started:  > Explore all of our simulator bundles and packages here> Shop our Lux setups here> Take a look at our affordable EasySim setups What a playable setup really means A playable simulator setup has a minimum of four layers: Ball tracking: A launch monitor that is the brains behind your virtual golf setup. Impact + safety: A screen/net, with optional enclosure/protection Feel + durability: A hitting mat or turf to add safety, comfort, and realism to your simulator rounds and practice. Display + software: Some form of projector/TV + device/software (depending on your setup), so that you can see your shots in action and enjoy immersive sessions. Bear in mind that many bundles and packages are focused on the core items you need, for example combining launch monitors with an enclosure and a hitting mat. But usually you can add extras during the process, such as a PC, a projector, and other finishing touches you may need.  Don’t get caught out thinking one bundle equals a finished sim. Always double-check what’s included first.  Bundles vs buying separately: the reality A lot of first-time simulator builds start with the same assumption: That you can buy a launch monitor, then add the rest later. That approach looks good on paper, but it's best to think of indoor golf as more of a chain. If any one link is weak, the whole setup can feel wrong. With that in mind, a bundle or package isn’t just a case of convenience. It’s the fastest way to get to a setup that is playable from day one. Why bundles are usually the fastest route to a playable setup You’re buying a complete chain, not a single headline item Most DIY builds begin with the launch monitor because it feels like the main purchase. And that’s fair enough because that’s where the bulk of your cost is likely to be.  But then reality kicks in. You still need a safe impact solution, a mat that doesn’t punish your body, a setup that actually feels like golf, and a bunch of other ncie to haves.  Golf simulator bundles are a great starting point because they span the full chain: launch monitor plus screen or net solution plus mat. That’s the difference between owning a single product and having a simulator you can use. Compatibility problems get solved before they appear Buying separately is where people get trapped in the fit/setup spiral: will this screen work with that enclosure, will the mat sit right, will the ball flight and impact point make sense, have I missed a key component?  Bundles remove most of that, because you can trust that suppliers like us have chosen core components that will work together as an indoor build. You avoid the learning tax DIY builds are rarely cheaper for first-timers. The cost is not always the item price, it’s buying the wrong thing once and then buying the right thing later. You might end up with a screen or net solution that is louder or less durable than expected. Your mat might be aggravating your wrists and elbows, or your whole setup might feel so temporary and bodged that you end up hardly using it.  You can think of golf simulator bundles as a shortcut to avoid those pesky feelings of regret! Add-ons become upgrades, not rescue purchases When you buy separately or bit by bit over time, extra components can feel like fixes or rescues, addressing something you missed the first time around. When you buy a bundle, optional extras are upgrades you choose because they improve the experience.  When buying separately can make sense Buying your golf simulator setup piece-by-piece can be the right move in some cases. For example, if:  You already own a solid screen, enclosure, or mat and don’t want duplicates You have specific space constraints and you know exactly what fits You enjoy the build process and are happy spending extra time dialling things in If your main goal is to get playing indoors quickly and avoid wasted purchases, bundles are usually the smarter route. What you can expect from GolfBays bundles Most GolfBays bundles are built around the components that make an indoor setup playable: Launch monitor Impact screen or enclosure or a net setup A hitting mat or turf That core gets you to the point where you can hit safely and get meaningful feedback. Popular Golf Simulator add-ons  Once the key parts are in place, you can upgrade based on your space and budget to include:  A projector and mount Putting turf A gaming PC to run your simulation Best-selling bundles that get you playing fast Our Overall Best Sellers  SkyTrak+ SimBox Home Golf Simulator Full PackageYou bring the swing. We’ll supply the setup. The SkyTrak+ Bundle includes four essentials that play perfectly together: a SkyTrak+ Launch Monitor, a GolfBays SimBox enclosure, our PRO+ Premium impact screen, and a GolfBays Standard Hitting Mat. SkyTrak Golf Simulator BundleSimilar package, but with the original SkyTrak launch monitor instead of the + version, alongside a standard mat, Pro+ premium screen, and a SimBox enclosure sized to suit your space.   Garmin Approach R50 SimBox Home Golf Simulator Full PackageThis package includes the Garmin R50 Launch Monitor, a GolfBays Standard Hitting Mat, our PRO + Premium Enclosure Screen, and a SimBox Enclosure.  Our Most Popular Premium Bundles ProTee VX GolfBays Lux Home Golf Simulator Full PackageThe GolfBays Lux Golf Simulator Hitting Enclosure is designed to provide the ultimate indoor golfing experience. This package combines the state-of-the-art enclosure with the ProTee VX, an insert tee mat, rubber base, plus a BenQ AH500ST projector and mount.  Foresight GC3 GolfBays Lux Home Golf Simulator Full PackageIncludes a Lux Bay Hitting Enclosure, a Foresight GC3 launch monitor, a Nylon Insert Tee Mat, and a ViewSonic LS711HD Projector with mount. FlightScope Mevo+ GolfBays Lux Home Golf SimulatorIncludes our Lux Bay Hitting Enclosure, the Flightscope Mevo Plus launch monitor, Face Impact Location for the Mevo+ Pro Package, a Nylon Insert Tee Mat, and a BenQ AH500ST Projector and mount. Affordable Golf Sim Packages If you want something that works in the garage without the financial headache of building your own mini Augusta, consider one of the packages below...  Garmin R10 EasySim Golf Simulator BundleThis budget package includes the popular Garmin R10 launch monitor, a standard mat, and our market-leading EasySim enclosure. Rapsodo MLM2PRO EasySim Golf Simulator BundleThis affordable golf simulator package includes the Rapsodo MLM2PRO launch monitor, a standard GolfBays hitting mat, and our EasySim enclosure, plus Rapsodo Callaway golf balls.  Square Golf EasySim Golf Simulator BundleThis budget package includes a Square Golf launch monitor, our EasySim enclosure, and a standard hitting mat.  Get playing! At the end of the day, the best golf simulator setup is the one that gets you playing sooner, not the one that leaves you surrounded by boxes, browser tabs, and a nagging sense that you’ve made life harder than it needed to be. If you want the quickest, smartest route to a setup that works, a simulator bundle is usually the clear winner. But if you already know your space, your spec, and exactly how you want to build it, going piece by piece can still make sense. Either way, the goal is the same: a setup that feels right, performs properly, and makes you want to step in and hit another shot. Explore all of our golf simulator packages and bundles here >
When a Purpose-Built Golf Simulator Cabin Makes Sense

March 30, 2026

By Malek Murison

When a Purpose-Built Golf Simulator Cabin Makes Sense

A purpose-built golf simulator cabin might seem like an indulgence. But the truth is, it becomes essential the moment you start to really care about consistency.  It’s not about the Instagram post on day one as you unveil your new gadgets and setup - although yes, that is part of the fun. It’s about the Tuesday evening session in February when it’s cold, dark, and you still want reliable numbers and a place to practice in peace. Reality check: you’ve probably outgrown a spare-room or garage golf setup if… You’re constantly tweaking the mat, alignment, lighting, or software because the results feel off from session to session. You practise less than you planned because setting up, packing away, or sharing the space is a hassle. Left and right-handers can’t both play comfortably, or someone always ends up swinging cautiously to avoid walls, lights, or furniture. Noise, rebound, or vibration is a recurring issue, whether that’s bothering the household or just making the space unpleasant to use. You’re spending real money on tech (launch monitor, projector, PC) but housing it in a space that’s damp, cold, dusty, or generally not built for it. The room’s multi-purpose promise is actually killing usability, because the golf setup keeps getting compromised to make it a cinema, gym, or storage area. You want a setup you’ll still love in 12 months, not one that looks impressive on day one and slowly becomes a slightly annoying project. If two or more of those hit home, a purpose-built cabin stops being indulgent and starts being the sensible option. A dedicated golf cabin is worth considering if you want… Serious year-round practice There’s a tipping point most golfers hit without realising it. You stop wanting to hit a few balls and you start wanting sessions that actually move the needle. That might look like a wedge matrix instead of banging driver for half an hour, or finally figuring out whether your miss is face-related or path-related. It might be building a consistent warm-up, running the same 30-ball test each week, or playing simulated rounds where you can’t just hit a mulligan every time you don’t like the number. That’s where a purpose-built cabin starts to make sense. Not because it’s fancier, but because it supports the kind of repeatable practice that improvement relies on. Same environment, same setup, same feel. When you’re tracking progress over months, that stability is half the battle. A cabin gives you a stable environment where you can train through winter without fighting condensation, green fees, cold hands, or a damp space that makes you rush sessions. It’s also when practice becomes frictionless: step in, switch on, hit. No dragging kit out, no moving furniture. Just play golf!  Reliable launch monitor data you can actually trust Launch monitors are only as useful as the conditions around them. A cabin helps you control the stuff that, left unchecked, quietly ruins accuracy or consistency: Lighting and glare (a common cause of misreads, especially in camera-based systems) Level flooring and secure mounting (important for repeatable alignment) Stable hitting position (tee placement, mat orientation, and stance consistency) Enough depth behind the screen to manage rebound behaviour and noise If you care about spin, face, path and strike consistency, the room becomes part of the measurement system. That’s the bit people underestimate. A comfortable space for left- and right-handed players Sharing a simulator is where most setups fall apart. Not because the tech can’t handle it, but because the room layout can’t. A cabin is the right call if you want a layout that allows: practical swing clearance on both sides sensible screen centring (so nobody feels like they’re aiming at a corner) safe, comfortable spectating without standing in the danger zone If you’ve ever watched a left-hander trying not to take a lamp shade off in a spare room, you already know why this matters. A simulator that feels good to use, not just impressive on day one A wow build can still be annoying in daily use. The cabin becomes worth it when you prioritise the boring things that make you use it more: proper heating and ventilation so the space isn’t either freezing or stuffy acoustic treatment so every impact doesn’t echo through the garden (or the house) clean cable management and kit placement so it stays tidy and durable lighting designed for play, not just ambience If the space feels calm, comfortable, and purpose-built, you’ll practice more. If it feels like a compromised hobby corner, you won’t. A multi-purpose studio that works as a golf space first Most people say they want golf + cinema + games room. In practice, the priorities clash unless the room is designed properly. In reality, a cabin keeps golf from taking over the rest of the house. A lot of home simulator setups don’t fail because the tech is bad. They fail because the rest of the household gets fed up. It starts innocently. A mat in the corner. A net that’s supposed to be temporary. A few balls under the sofa. Then the projector comes out, the cables multiply, and suddenly the spare room is a permanent half-gym, half-office, half-driving range that nobody really likes using. A cabin draws a clean line. Golf lives there. Your home stays a home. And there’s a practical upside beyond domestic peace. When your kit lives in a dedicated space, it stays set up properly. It stays cleaner. It lasts longer. And you’re far more likely to use it, because you don’t need to turn the living room into a studio every time you want to work on your swing. A cabin makes sense when you want multi-use without sacrificing golf functionality. You get:  A golf-first layout (screen placement, hitting zone, clearance) Entertainment as a bonus, not the main design driver Seating and social space that doesn’t interfere with swing safety or tracking That’s how you end up with a space you actually use for golf, rather than a room that occasionally hosts a novelty round. More golf and less wasted time A simulator cabin isn’t just a spend, it’s a trade. You’re trading money for a reduction in golfing friction. If you’re losing sessions to weather, to the dread of having to set up all your virtual gear, to moving furniture, to negotiating space, to the garage being too cold or too cluttered… then your practice becomes sporadic. And sporadic practice is the sneaky killer, because it feels like you’re doing the work, but the gaps between sessions mean you’re constantly re-finding your swing instead of improving it. This is why the cabin route often makes sense for time-poor golfers. When you can walk in, switch on, and hit within two minutes, practice survives real life. It stops being something you plan to do, and becomes something you actually do. Golf cabin, garage conversion, or spare room? If you’re weighing up options, here’s a simple way to think about it. A spare room setup can work well if your goal is casual use, shorter clubs, and a neat solution that blends into the house. It’s the easiest route, but it’s also the one most likely to come with compromises around space. A garage can be a great middle ground if you can commit the space, keep it clear, and make it comfortable enough to use year-round. When garages work, they work brilliantly. When they don’t, it’s usually because they turn into storage again and practice starts slipping. A purpose-built cabin makes the most sense when you want golf to have its own home, with fewer compromises and fewer reasons not to play. It’s the option that’s most likely to remain a joy to use in a year’s time, not just an impressive project you set up once and slowly stop bothering with. If you’re reading this and thinking, “I could probably make the spare room work”, you might be right. But if you’re constantly having to make it work, you already have your answer. Explore our Golf Simulator Cabins by GolfBays service to see what’s possible in your garden >
How to Plan a Golf Simulator Cabin: Size, Height, Cost and Common Mistakes

March 30, 2026

By Malek Murison

How to Plan a Golf Simulator Cabin: Size, Height, Cost and Common Mistakes

Planning a golf simulator cabin is a very different proposition from buying a mat, a launch monitor, and squeezing them into your spare room. That’s because a golf simulator cabin is the foundation for your dream setup. There should be room for everything except compromises.  With many years’ experience providing golf tech to our customers, we’ve found that most of the problems home golfers experience - misreads, awkward or restricted swings, inconsistent ball data, etc. - aren’t caused by the launch monitor or the software. They’re caused by rooms that were never designed for golf in the first place. That’s because a golf sim cabin, garden golf studio or bespoke golf shed only works if the fundamentals are right: space, ceiling height, layout, lighting, and how the technology fits into the room as a whole. Get those wrong, and even the best equipment in the world will feel compromised. This guide is designed to help you avoid all of that. We’ll walk through the decisions that actually matter when planning a golf simulator cabin and the common mistakes that we see.  Why Golf Simulator Cabins are so popular For golfers, the appeal of a fully custom setup is obvious: You get to practise on your terms, play a full round whenever you like, and keep your game progressing without relying on daylight, weather, or (often expensive) tee times. A golf cabin turns practice into something you can take seriously and look forward to. But the jump from home simulator to a purpose-built golf cabin is a big one. It’s not just about choosing the right technology. It’s about creating a dedicated space that allows you to swing freely, capture reliable data, and love every minute. Most of all, it’s an altogether more permanent decision that needs to be carefully considered. If you’re thinking about building a dedicated space for your golf sim, the Golf Simulator Cabins by GolfBays service handles the entire process from design through to final calibration. Get started here > How are Golf Simulator Cabins Different from Garden Rooms? This is a question we get all the time, and the answer is simple. A standard garden room is designed for people to sit in, maybe for storage too.  A simulator cabin is designed for people to swing golf clubs at full speed, launch a ball into an impact screen, and collect accurate data with whatever monitor and simulator system you’ve chosen. These obvious differences affect everything when planning your space, including:  Ceiling height and roof structure Internal width and hitting position Depth (between ball, screen and projector) Lighting placement and glare control Ventilation and condensation management Power outlet positioning If you treat a golf simulator room like a generic garden room, you’ll end up with something that just isn’t fit for purpose. It might technically work but it’ll never feel quite right. How Much Space Do You Really Need for a Golf Simulator Cabin? This is the most common question we get, and also the one where vague advice causes the most problems. So let’s get specific.  A realistic starting point: Internal dimensions  For most golfers, a comfortable, future-proof simulator cabin starts at: Width: 4.0m Depth: 5.5-6.0m Height: 2.7-3.0m That combination gives you:  Space for a natural driver swing A centred hitting position (important for left- and right-handed players) Correct ball-to-screen distance A workable projector throw without awkward mounting Sure, you can build it smaller. But if you skimp on these dimensions, layout precision becomes critical and some launch monitor options may be ruled out. Internal link: Our GolfBays cabin designs are adapted to your garden and budget. Ceiling Height Explained (And Why This Catches People Out) Ceiling height is the single most underestimated factor in home golf simulators. What works in practice 3m internal height is the sweet spot for most home simulators 2.8m internal can work, but it becomes swing-dependent, especially with the driver. Anything below that, and many players subconsciously alter their swing to avoid the ceiling - which defeats the whole purpose of having a virtual practice and play setup.  Why internal height matters more than external Roof structure, insulation, flooring build-up and other finishes can easily steal 20-30cm if they’re not planned properly. The result is a cabin that looks tall enough on paper but feels tight in reality. Height also becomes more complicated near garden boundaries, where permitted development rules often cap external dimensions. This is where early design decisions matter, and where retrofitting becomes expensive. All the more reason to get it right at the planning stage!  Radar vs Camera Launch Monitors: Why Space Matters Choosing a launch monitor for your golf cabin isn’t just about brand or budget. It’s about whether your space can support the technology properly. Different sims require different dimensions based on the underlying tech: radar or photometric.   Radar-based systems Track ball flight from behind the golfer Typically need more depth as a result Can struggle with accuracy in shorter cabins unless the layout is optimised Camera / photometric systems Work well in more compact spaces Are less dependent on long ball flight Are more sensitive to lighting quality and alignment The mistake many people make is buying simulator hardware first, then trying to force the room to fit around it. Instead, a more holistic approach to gear and cabin is the way to go. The Golf Simulator Cabins by GolfBays service designs the room and simulator as one system, so everything works together from day one. Get started here > How Far Should You Stand from the Impact Screen? As a rule of thumb, most setups perform best when the hitting position is at least 2.5m from the impact screen. This distance: Improves safety Reduces bounceback risk Produces more realistic ball flight and feel Equally important is what sits behind the screen. Leaving at least 30cm between the impact screen and the back wall allows the screen to absorb impact properly and protects the structure behind it. These are small details, but they make a big difference over thousands of shots. Do You Need Planning Permission for a Golf Simulator Cabin in the UK? In many cases, no. Most golf simulator cabins can be built under permitted development, provided they meet standard outbuilding rules. Typical constraints include: Single-storey construction Height limits (which vary by roof type and proximity to boundaries) No more than 50% garden coverage Not positioned forward of the main house The main pressure point for golf cabins is height, particularly if the building sits close to a boundary or within a conservation area. A well-designed cabin can often stay within permitted development while still delivering usable internal height, but it needs to be thought through early. How Much Does a Golf Simulator Cabin Cost in the UK? Golf cabin costs vary widely depending on scope, but it helps to separate two things to give you a clearer idea. First… Simulator equipment Entry-level setups can start around £2,000 Premium systems with high-end launch monitors, projectors and PCs can exceed £40,000 Your choice of system alone will go a long way toward determining the price of your total build.  The cabin itself Cost is driven by: Size and height Insulation and acoustic treatment Exterior cladding and glazing Ground conditions and access Electrical and data requirements The important thing to know: A well-designed cabin often saves money long-term by avoiding retrofits, upgrades and compromises later. To get accurate pricing for your space, start with the GolfBays Golf Simulator Cabin design process > Common Mistakes People Make When Planning a Golf Simulator Cabin We’ve been doing this for a while, and here are some of the things that come up again and again: Building too smallA cabin that just about fits often feels restrictive in use. Underestimating ceiling heightEspecially once roof and floor build-up are factored in. A few cms here and there makes all the difference! Choosing the simulator before the roomThis limits layout options and can reduce accuracy, leading to a very unsatisfied golfer. Ignoring ventilation and condensationMoisture is hard on screens, projectors and electronics. These are the little details that make your golf cabin a long-term oasis rather than something that needs a retrospective fix. Treating it like a shed, not a studioGolf simulators are technical environments, not garden storage. The good news is: All of these issues are avoidable with proper planning. When a Purpose-Built Golf Simulator Cabin Makes Sense A dedicated golf cabin is worth considering if you want: Serious year-round practice Reliable launch monitor data Comfortable space for left- and right-handed players A simulator that feels good to use, not just impressive on day one A multi-purpose studio that works as golf space first, entertainment space second If that sounds like what you’re planning, explore our Golf Simulator Cabins by GolfBays service to see what’s possible in your garden. Planning First Makes Everything Better The best golf simulator cabins aren’t defined by brand names or spec sheets. They’re defined by a space that’s designed properly, accounting for the swing, the technology, and the way you actually want to use it. Get the room right, and everything else falls into place. If you’re ready to move from ideas to a workable plan, and build the cabin around the golf - start with a proper design conversation today > 
Radar vs Photometric Launch Monitors: Which Works Best Indoors?

March 30, 2026

By Malek Murison

Radar vs Photometric Launch Monitors: Which Works Best Indoors?

If you’re building an indoor golf setup, a standard piece of advice you’ll hear is that radar launch monitors are best for outdoors and photometric launch monitors are best for indoors. Sure, there’s some truth in that. But there’s also a whole lot of missing context. Because in reality, the best indoor setup isn’t just about choosing the best technology. It’s about choosing what matches your space, your tolerance for setup faff, and how much you care about things like spin accuracy, short game practice, and lefty/righty convenience. In this guide, we break that down with real-world indoor constraints in mind. A Quick Verdict For Indoor Golfers Choose Radar if… You want something portable you can use indoors and outdoors You’ve got enough depth for a decent amount of ball flight You’re willing to use RCT balls / metallic dots / patterned balls when needed for better indoor spin capture Choose Photometric (camera-based) if… Your space is tight and you want reliable readings without needing loads of depth for ball flight You mainly care about indoor practice and sim play You want readings to be consistent without regularly tweaking the setup Choose a Ceiling-Mounted Setup if… You’ve got mixed-handed players (or multiple users) and you don’t like the idea of moving kit around while playing You want a clean floor area and a built-in feel You want minimal interruption between shots What Does Radar vs Photometric Mean? Radar launch monitors (Doppler) Radar launch monitors use Doppler radar to track the ball by sending out radio waves and reading the signal that bounces back. From that return signal, the unit calculates key ball-flight data - stats like launch direction, speed and trajectory - as the ball travels away from the hitting area. Indoors, the trade-off is straightforward: the less ball flight you can provide, the less information the radar can capture before the ball hits the screen. That can lead to more estimation, especially on spin and shot shape, and less consistent results if your space or setup is tight. With radar, space and setup matter more. But if you get the distances and alignment right it can be excellent. Photometric launch monitors (camera-based) Photometric launch monitors use high-speed cameras to capture the ball at (and immediately after) impact. Instead of tracking the ball over several metres of flight, they analyse what the cameras see in those first few frames - the ball’s launch direction, launch angle, speed and spin behaviour - and build your virtual shot from that data. Indoors, that’s a big advantage because you don’t need loads of ball flight to get accurate readings. With a clear view of the strike and the initial launch, a photometric launch monitor can produce consistent readings even in tighter spaces. The main thing that matters with photometric systems is the quality of the view they have at impact - placement, hitting zone, and factors like lighting and glare all add up to build the perfect playing environment.  Hybrid systems (radar + camera) Some launch monitors combine radar and camera, and some depend on patterned balls to accurately measure spin indoors. For example… The SkyTrak+ combines a photometric camera with dual Doppler radar The Rapsodo MLM2PRO uses radar processing plus camera systems, and supports its own RPT ball pattern for spin capture The Flightscope Mevo+ is radar-based but can be used with metallic dots or RCT balls for more reliable indoor spin readings Indoor Space Requirements for Radar Launch Monitors  Space and ball flight  Indoors, the biggest difference between radar and camera (photometric) launch monitors is how much they depend on ball flight distance. Radar needs more runway to read the shot cleanly. Camera systems need less runway, which is why they tend to be the easier option in tighter rooms. There are two distances you need to have top of mind when building a golf simulator setup.  The space between the launch monitor and ball strike zone. This is the space behind your hitting position. The space between the ball strike zone and your screen or net. This is your ball flight distance. Recommended Indoor Distances for Radar Setups These targets work well for most radar and hybrid portable units, but check the requirements of your chosen launch monitor before moving forward.  Launch monitor → ball: 1.8–2.6 m Ball → screen/net: 2.4 m minimum, but 3.0–4.0 m is where radar becomes noticeably more consistent Safety gap behind the screen: 0.3 m (so the screen isn’t right up against a hard wall) Measurement Examples from Popular Launch Monitors  Garmin R10: The device should be 1.8–2.4m behind the ball, with the ball at least 2.4 m from the screen/net. Rapsodo MLM2PRO: The device should be 2.0–2.6 m behind the ball, with the ball at least 2.4 m from the impact screen or net.  FlightScope Mevo+: The device should be 2.1–2.7 m behind the ball, with a recommended ball flight of 4.0m, along with metallic dots / Titleist RCT for accurate spin measurements.  TrackMan 4: The ball flight minimum is around 3.0 m, with an optimal distance of 3.7 m. What Goes Wrong When Space is Tight? When a radar launch monitor doesn’t get enough ball flight, you will see: Spin and curvature that don’t match what you expect Driver numbers that jump around Wedge shots that lose consistency This is also why radar users often improve indoor results with spin-friendly balls (RCT/patterned balls) or small reflective dots. This gives the system more to lock onto. Depth limited? Camera-based or ceiling-mounted systems are usually the least hassle indoors when space is tight, because they rely less on long ball flight. Spin: Calculating or Measuring?  Indoors, some radar units struggle to directly capture spin without an assist, which is where Radar Capture Technology (RCT) balls, metallic stickers, or patterned balls enter the picture. For example:  Garmin’s R10 supports Titleist RCT balls to improve indoor spin measurement Rapsodo uses RPT balls/pattern recognition for spin rate and spin axis capture (via its Impact Vision camera) FlightScope recommends using metallic dots or RCT balls for accurate spin measurements indoors with the Mevo+ What this really means for you If you care about gapping, shot shape, and wedge control, spin consistency matters more than the headline number of metrics. If you’re happy with less accurate ball flight and care more about fun sim rounds, you can often accept a higher degree of estimation. Playing with Left & Right-Handed Players If you’ve got both right-handers and left-handers using the same bay, the best launch monitor is the one you don’t have to keep moving. This is where ceiling-mounted systems come into their own. You get right and lefty-friendly switching with ceiling-mounted convenience. If you’re sharing the sim between left and right-handed players, ease and value tend to overlap. Because a fiddly setup gets used less and a smooth one is a pleasure to play with! Lighting and Environment: Because Garages Aren’t Studios Indoor environments vary wildly, with sunlight leaks, reflective surfaces, uneven floors, and more all contributing to how well your launch monitor performs. Camera-based systems can be sensitive to lighting conditions, while radar can be sensitive to placement and interference. Radar vs Photometric Indoors: The GolfBays Comparison Factor Radar (behind-the-ball) Photometric / camera-based Ceiling-mounted launch monitors Space sensitivity Higher (needs usable ball flight) Lower (often more forgiving indoors) Lower (fixed install) Indoor spin capture Often improved with RCT/dots/patterned balls More direct camera-based capture (device dependent) Designed for consistent indoor capture; ball and club sticker requirements vary by model. Lefty/righty convenience Usually good Varies by placement Excellent Setup friction Medium (alignment, space, ball choice) Low-medium Low once installed Best for Indoor + outdoor versatility Indoor-first practice/sim Dedicated indoor bay, shared use Best-selling Indoor Launch Monitors, Split by Radar / Photometric  We won’t pretend that there’s one right answer when choosing a launch monitor. Your best pick will depend on your setup, your goals, and of course, your budget. Below are some of our best sellers.  Radar Launch Monitor Best Sellers Garmin Approach R10 Best for: budget-friendly indoor + outdoor practice, especially if you’re happy to optimise setup. Garmin also supports Titleist RCT balls to improve indoor spin capture. FlightScope Mevo+  Best for: golfers who want indoor sim + outdoor range with deeper data. FlightScope Mevo Gen 2 Best for: entry-level radar practice with space considerations similar to other radar units.  Rapsodo MLM2PRO  Best for: golfers who want portable sim play and are comfortable using the brand’s ball ecosystem for measured spin.  Photometric / camera-based launch monitor best sellers SkyTrak  Best for: indoor-first sim setups where you want straightforward use and minimal reliance on long flight.  SkyTrak+  Best for: indoor golfers who want the indoor-friendly feel of SkyTrak plus additional club data via dual Doppler radar. Shop SkyTrak Garmin Approach R50  Best for: players who want a premium, self-contained indoor sim experience with camera-based tracking. Uneekor Eye Mini Lite Best for: dedicated indoor users who want detailed capture. ProTee VX Best for: a clean, shared, dedicated sim bay. Ceiling-mounted, lefty-friendly, and no stickers. Square Golf Launch Monitor  Best for: indoor-only setups wanting camera-based measurement. Radar vs Photometric Launch Monitor FAQs Are photometric launch monitors more accurate indoors? Often, they’re more forgiving indoors because they rely less on long ball flight. But accuracy depends on the specific model, setup, and what data you care about (spin vs club delivery vs sim play). Do radar launch monitors need special balls indoors? Some radar setups improve indoor spin capture with aids such as reflective dots, and manufacturers explicitly recommend them in certain indoor scenarios. What’s best for a garage setup? If space is tight, camera-based systems are usually the least painful route. If you’ve got decent depth, radar/hybrid can be great - but it’s more sensitive to setup. What if both lefties and righties will use the sim? Ceiling-mounted systems and certain behind-the-ball setups are usually easiest because you’re not constantly moving the unit around.
Converting Your Garage into a ProTee Golf Sanctuary

March 10, 2026

By Robert Hart

Converting Your Garage into a ProTee Golf Sanctuary

Let's be honest: your garage is likely a graveyard for half-empty paint cans and a lawnmower that sees action once a fortnight. Meanwhile, your golf game is suffering because the local range is a trek and the weather is, well, unpredictable.
The Complete Guide to Golf Alignment Sticks

November 19, 2025

By Malek Murison

The Complete Guide to Golf Alignment Sticks

Considering all the swing gadgets competing for space in your bag, golf alignment sticks might still rank as the simplest, most accessible training aid. Coaches around the world use them to check aim, ball position, and swing path, and many tour players use them for drills on the range when warming up for a round. So how can something so small and low-tech have such an oversized impact?... Your New Secret Weapon: Golf Alignment Sticks A simple truth in golf is that a lot of bad shots don’t come from a disastrous swing - they come from starting in the wrong place. Aim a few yards off line, let your stance or posture slip, or set the ball in a position that doesn’t quite match the club you’re using, and suddenly your swing has to make compensations you never intended. That's where alignment sticks come in. They give you clear, honest feedback on where you’re actually pointing, how your setup looks, and whether your expectations match reality. It’s why PGA professionals and top coaches build whole sessions around a couple of bright rods on the ground. Used well, alignment sticks help you groove a repeatable setup, a more reliable swing path, and better start lines with everything from driver to putter.  
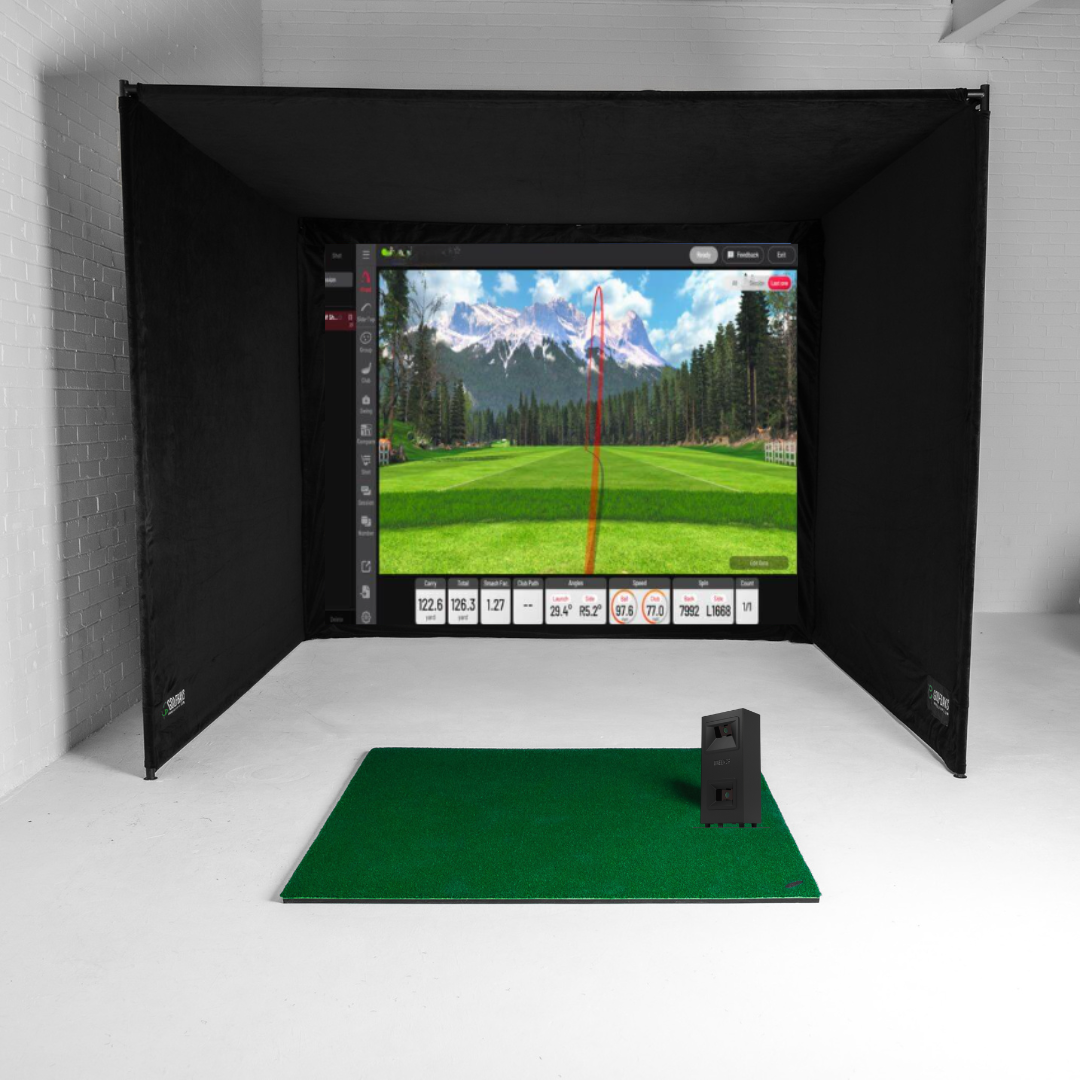
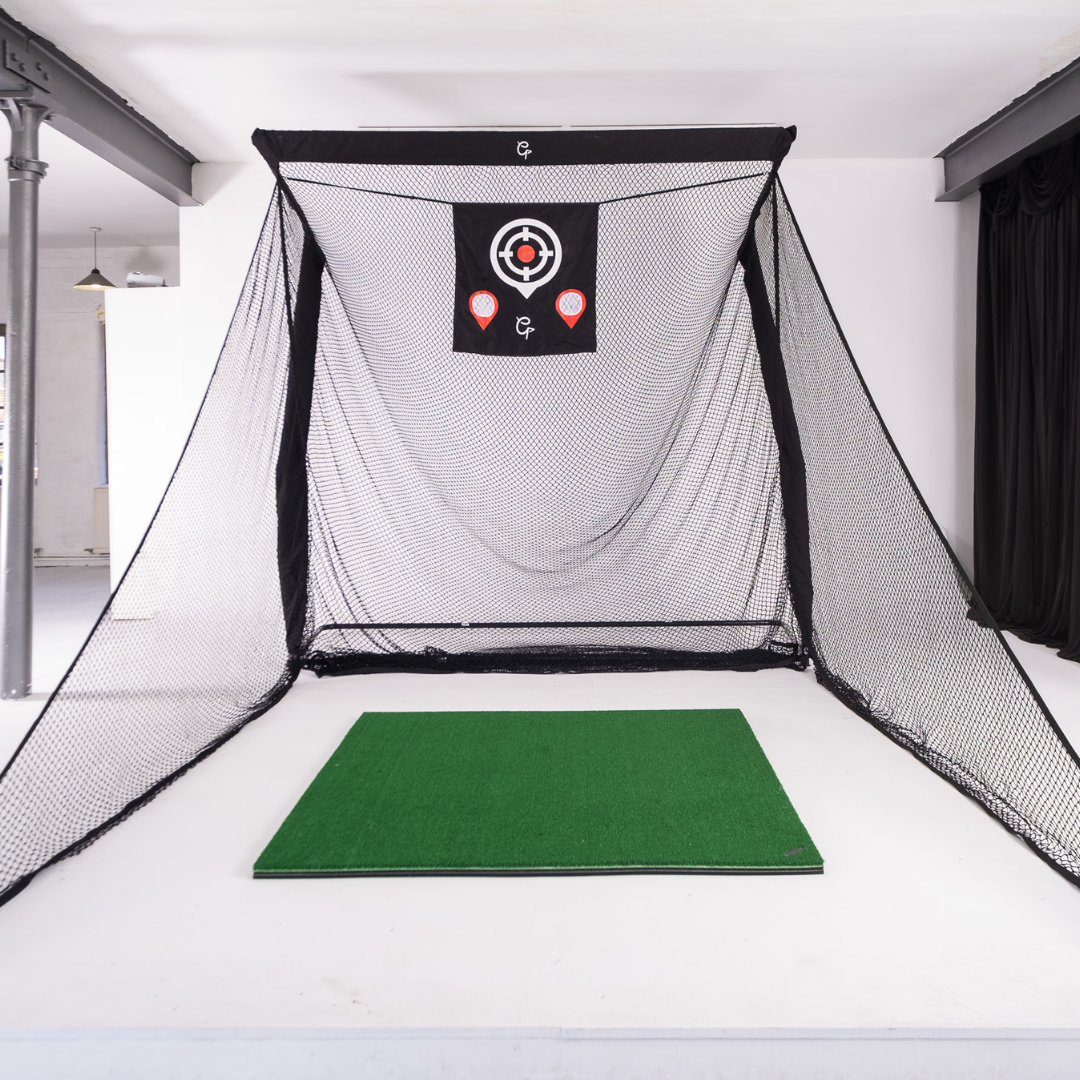
At GolfBays, we stock a number of swing alignment tools. If you just want a dependable pair for everyday range work, the Tour Rodz Alignment Sticks are a classic, no-fuss option for checking aim, ball position and basic swing mechanics. If you prefer something that lives in your bag and goes everywhere with you, the Longridge Portable Tour Rod Alignment Sticks fold down small and are built for portable practice, while the PuttOut Putting Plane Alignment Stick Set gives you a compact, indoor–outdoor setup for working on putting alignment, stroke path and face control. When you’re ready to get more technical, the Swing Plate and the Swing Plate Dual Pro turn a simple pair of alignment sticks into a full practice station. With adjustable stick angles for swing plane, club path and start-line gates, they’re ideal for building repeatable movement patterns instead of just hitting ball after ball and hoping something changes. View all of our Alignment Stick products here.  Whichever route you take, the aim is the same: to make every practice session more precise, more consistent, and more productive than emptying another bucket and hoping for the best. What Are Golf Alignment Sticks? Golf alignment sticks are exactly what they sound like: slim, lightweight rods designed to give you a clear visual reference of your swing on the ground. They help you line up properly, rehearse better positions, and build a more consistent swing, without adding any extra complexity to your practice. You’ll see them all over tour ranges. Before a single ball is struck, many players lay down a couple of rods to check their aim, confirm ball position, and rehearse the path they want the club to travel on. It’s simple, repeatable, and brutally honest. If something in your setup is off, an alignment stick will make it obvious straight away. For everyday golfers, they’re one of the easiest ways to improve the fundamentals that quietly shape every shot you hit. They keep your aim square to the target, tidy up your stance and posture, and guide your swing path so you aren’t fighting the same slice or pull round after round. And the best part? They’re far more versatile than they look. One minute they’re helping you with start lines, the next they’re a makeshift putting gate, a chipping landing-zone marker, or a swing-plane rail. No batteries or screens needed, just pure feedback. Sure, a good practice session might look like you’ve pitched a tiny neon campsite on the range. But look on the bright side: two sticks, endless ways to get better. Why Alignment Matters More Than You Think Most golfers blame their swing for every bad shot. In reality, a lot of slices, hooks and mis-hits start before the club even moves. If your feet, hips, shoulders and clubface aren’t all looking at roughly the same place, you’re asking a decent swing to do a very hard job. Aim a bit right, think you’re square, then make your normal move… the ball will start miles from where you pictured it. Nudge the ball too far forward or back in your stance… suddenly strike, height and direction all change. That’s not you having a terrible swing. That’s you starting from a poor setup. Alignment sticks bring truth and clarity to your practice. Lay one along your target line and one along your feet and you can instantly see whether your set-up matches what you had in mind. Add a stick to mark ball position, or use two as a simple gate on either side of the ball, and you’ll quickly learn to spot the patterns. Do you tend to hit off the toe or the heel? Does your path naturally move a touch from in-to-out or out-to-in? Do you stay centred, or drift off the ball? Over time, that honesty builds consistency and confidence. When your setup looks the same every time, and you know you’re starting from a good place, you can swing without second-guessing yourself. That means fewer compensations and last-second panic adjustments, and more shots that come out how you intended. Otherwise, trying to hit a fairway with bad alignment is a bit like using a sat-nav that’s a few degrees off. You might set off feeling positive, but you’re almost guaranteed to end up somewhere you didn’t plan – and no, it’s not always the driver’s fault!  What are the Benefits of Using Alignment Sticks? Alignment sticks don’t look like much, but once you start using them properly, they quietly transform the way you practise. They sharpen the fundamentals for new golfers and give experienced players the precision they need to fine-tune ball flight, strike and consistency. Here are 5 benefits of including them in your training routine…  Add Accuracy to Your Aim Most golfers genuinely believe they’re aiming at the target… until a stick on the ground proves otherwise. A single line pointing at your intended spot immediately reveals whether your feet, hips and shoulders are actually set where you think they are. The guesswork disappears. Your intentions match reality, and that alone brings a level of clarity many players have never experienced. When you know you’re aimed correctly, everything that follows feels more committed and much more confident. Build a Consistent Setup One of the quieter truths in golf is that what feels like losing your swing is often your setup drifting over time. Stance creeps a touch wider, shoulders sit a little open, ball position edges forward without you noticing. Alignment sticks make all of that visible. A stick along your toes gives you a clear reference for how wide you’re standing and where you’re aimed; a line pointing at the target shows instantly whether your feet, hips and shoulders are running parallel to it. Instead of relying on feel, you build a setup that looks the same every time, and a routine that genuinely repeats. Improve Your Swing Path Few things influence ball flight more than the direction the club is travelling through impact. Place a stick just inside or outside the ball and you’ve created a simple path indicator: clip the stick and you know your club is coming too far from that side. Angle a stick slightly to match your ideal corridor and you suddenly have a visual guide for a neutral path, a soft draw or a controlled fade. It’s one of the quickest ways to turn vague swing feels into something accurate and trainable. Get Better Ball Positioning Ball position affects strike, launch and start direction, yet it drifts more than most golfers realise. Put an alignment stick across your stance, perpendicular to your target line, and you now have a reliable reference point. You can place the ball slightly forward for longer clubs, around the centre for mid-irons, and exactly where you want it for wedges or speciality shots. No more guesswork. Just a clear starting point that matches the shot you’re trying to hit. Groove Your Putting Alignment 
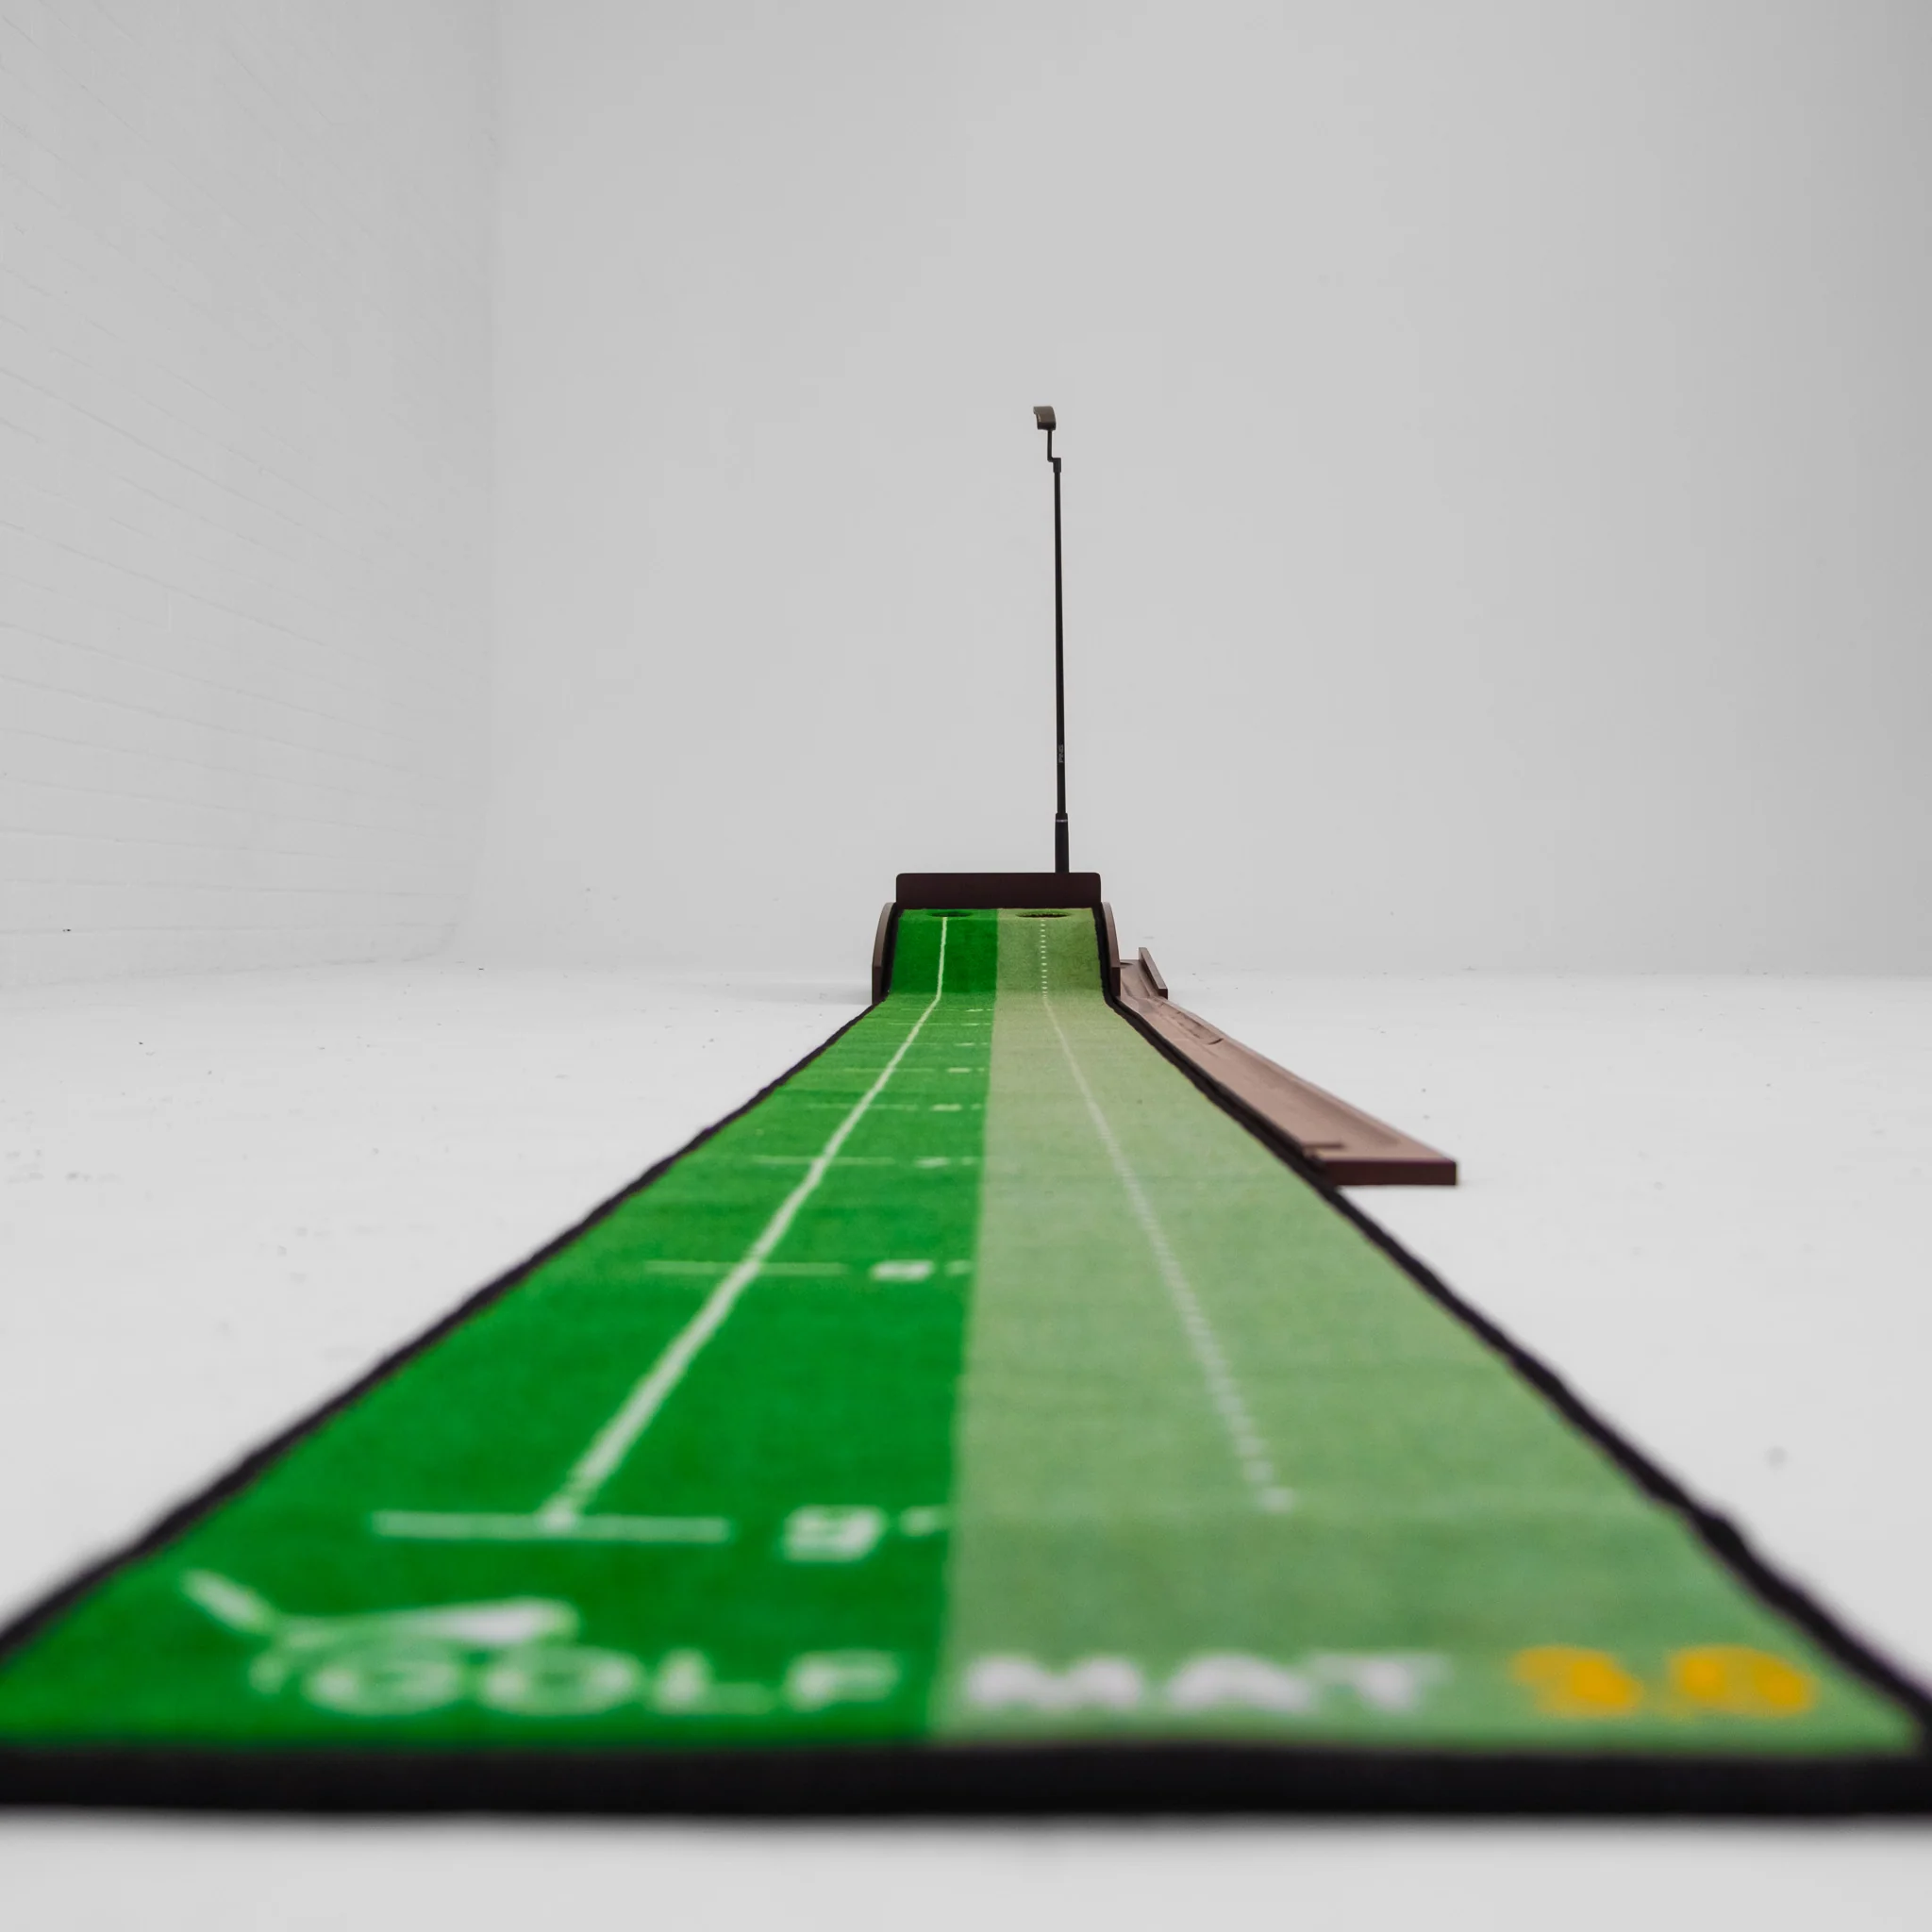
Putting is far easier when you know your ball is starting on line. Two alignment sticks become a perfect little gate: roll the ball through and you’ve nailed your start direction; hit a stick and you know the face or stroke is off. You can also lay sticks down to create a channel for your putter to follow, helping you square the face and keep your stroke tidy. It works on practice greens, putting mats, and with simulator setups.  7 Simple Drills for Your Golf Alignment Sticks The drills below are simple, widely recommended by coaches, and work whether you’re practising on the range, at home on a mat, or in a simulator bay. Each one has a clear setup and purpose. Basic Aim & Alignment Drill SetupLay one alignment stick on the ground, pointing directly at your target. Lay a second stick along your toes, parallel to the first. What it doesShows instantly whether your feet, hips and shoulders are aligned where you think they are. Many golfers trust their feel, but a simple stick on the ground tells the real story. How to use itHit 10-15 balls with the sticks down. Reset your address each time. Watch your start line and see how closely it matches your intended aim. Ball Position for Every Club SetupPlace one stick across your stance (perpendicular to the target line). Use it as a clear reference point for where the ball sits. What it doesHelps prevent ball position drifting forward or back, which is a common root cause of fat, thin and inconsistent strikes. Coaches rely on this drill to teach ball-then-turf contact and consistent setup. How to use it Longer clubs slightly forward of centre. Mid-irons around centre. Wedges slightly back or centre, depending on the shot.Hit a few balls with each club and note how the ball position affects the strike. Swing Path Drill SetupGo with one of two setups: Train-tracks: Two sticks on the ground, parallel to your target line and slightly wider than your clubhead. Path gate: One or two sticks angled just inside or outside the ball to represent the path you’re trying to build. What it doesProvides clear visual feedback on whether your swing path is coming too far from the inside, too far over the top, or closer to neutral. This is a go-to drill for working on slices and pulls. How to use itStart with slow, controlled half-swings, aiming to swing through the lane or gate without touching the sticks. Increase speed only when you can repeat it consistently. Footwork & Stance Width SetupLay a stick along your toes or slightly in front of them. What it doesHelps you maintain a consistent stance width and body alignment. Small changes in stance can affect balance, weight shift and your ability to return the club to the ball. This drill keeps your setup tight and tidy. How to use itBefore each shot, check whether your stance is the width you intended and that your feet are parallel to the target line. Adjust if needed before swinging. Putting Gate Drill SetupLay two sticks on the ground just wider than the width of your putter head. What it doesGives instant feedback on start line. If the ball clips either stick, your stroke or face angle was off. If it rolls cleanly through, you’re starting the ball on line. How to use itHit putts through the gate. Aim for 10 clean rolls in a row.  Short-Game Drill: Low-Point Control Gate Setup Lay one stick on the ground just behind the golf ball, about a clubhead’s width. Hit chip and pitch shots without striking the stick. You can also place a second stick slightly ahead of the ball to visualise where the club should bottom out. What it does Trains you to strike the ball first, then the turf. Helps ensure your weight, shaft angle, and low point are set correctly. Forces clean contact and prevents scooping or flicking at the ball. Builds the crisp, predictable strike that separates solid chippers from inconsistent ones. Hit the stick? Your low point was too far back. Miss the stick cleanly? You made proper ball-first contact. This is a simple and repeatable short-game drill, ideal for players who hit behind the ball. Body Rotation & Hip Line Control SetupThread an alignment stick through your belt loops so it sticks out on both sides. What it doesThis gives immediate visual feedback on how your hips are moving. If the stick slides dramatically or points up/down during your swing, you’re likely swaying rather than rotating, which can be a common cause of inconsistent strikes. How to use itMake slow half-swings and watch the stick. Aim for rotation rather than slide. When the movement looks stable and controlled, build up to fuller swings. This drill works best when you record yourself and review it in slow motion. Use the sticks as a guide to what the rest of your body is doing.  Golf Alignment Stick Product Overview: What's Available? Product What it is Best for Ideal drills / uses Good to know Tour Rodz Alignment Sticks 2pc – Orange Pair of full-length alignment sticks supplied with a protective tube and drill booklet. Golfers who want a simple, durable pair for everyday range and home practice. Aim and alignment, ball-position checks, swing-path gates, putting start-line gates, chipping and pitching checks. Reliable, non-collapsible, and ideal as a general-purpose alignment stick set. Longridge Portable Tour Rod Alignment Sticks Pair of alignment rods that fold into four sections and pack down into a short tube for easy storage in your golf bag. Players who want alignment sticks that travel well or prefer compact storage in the bag. All core alignment-stick drills: aim, alignment, ball position, path gates, and posture checks. Functionally similar to standard sticks, but more portable and convenient thanks to the folding design. 
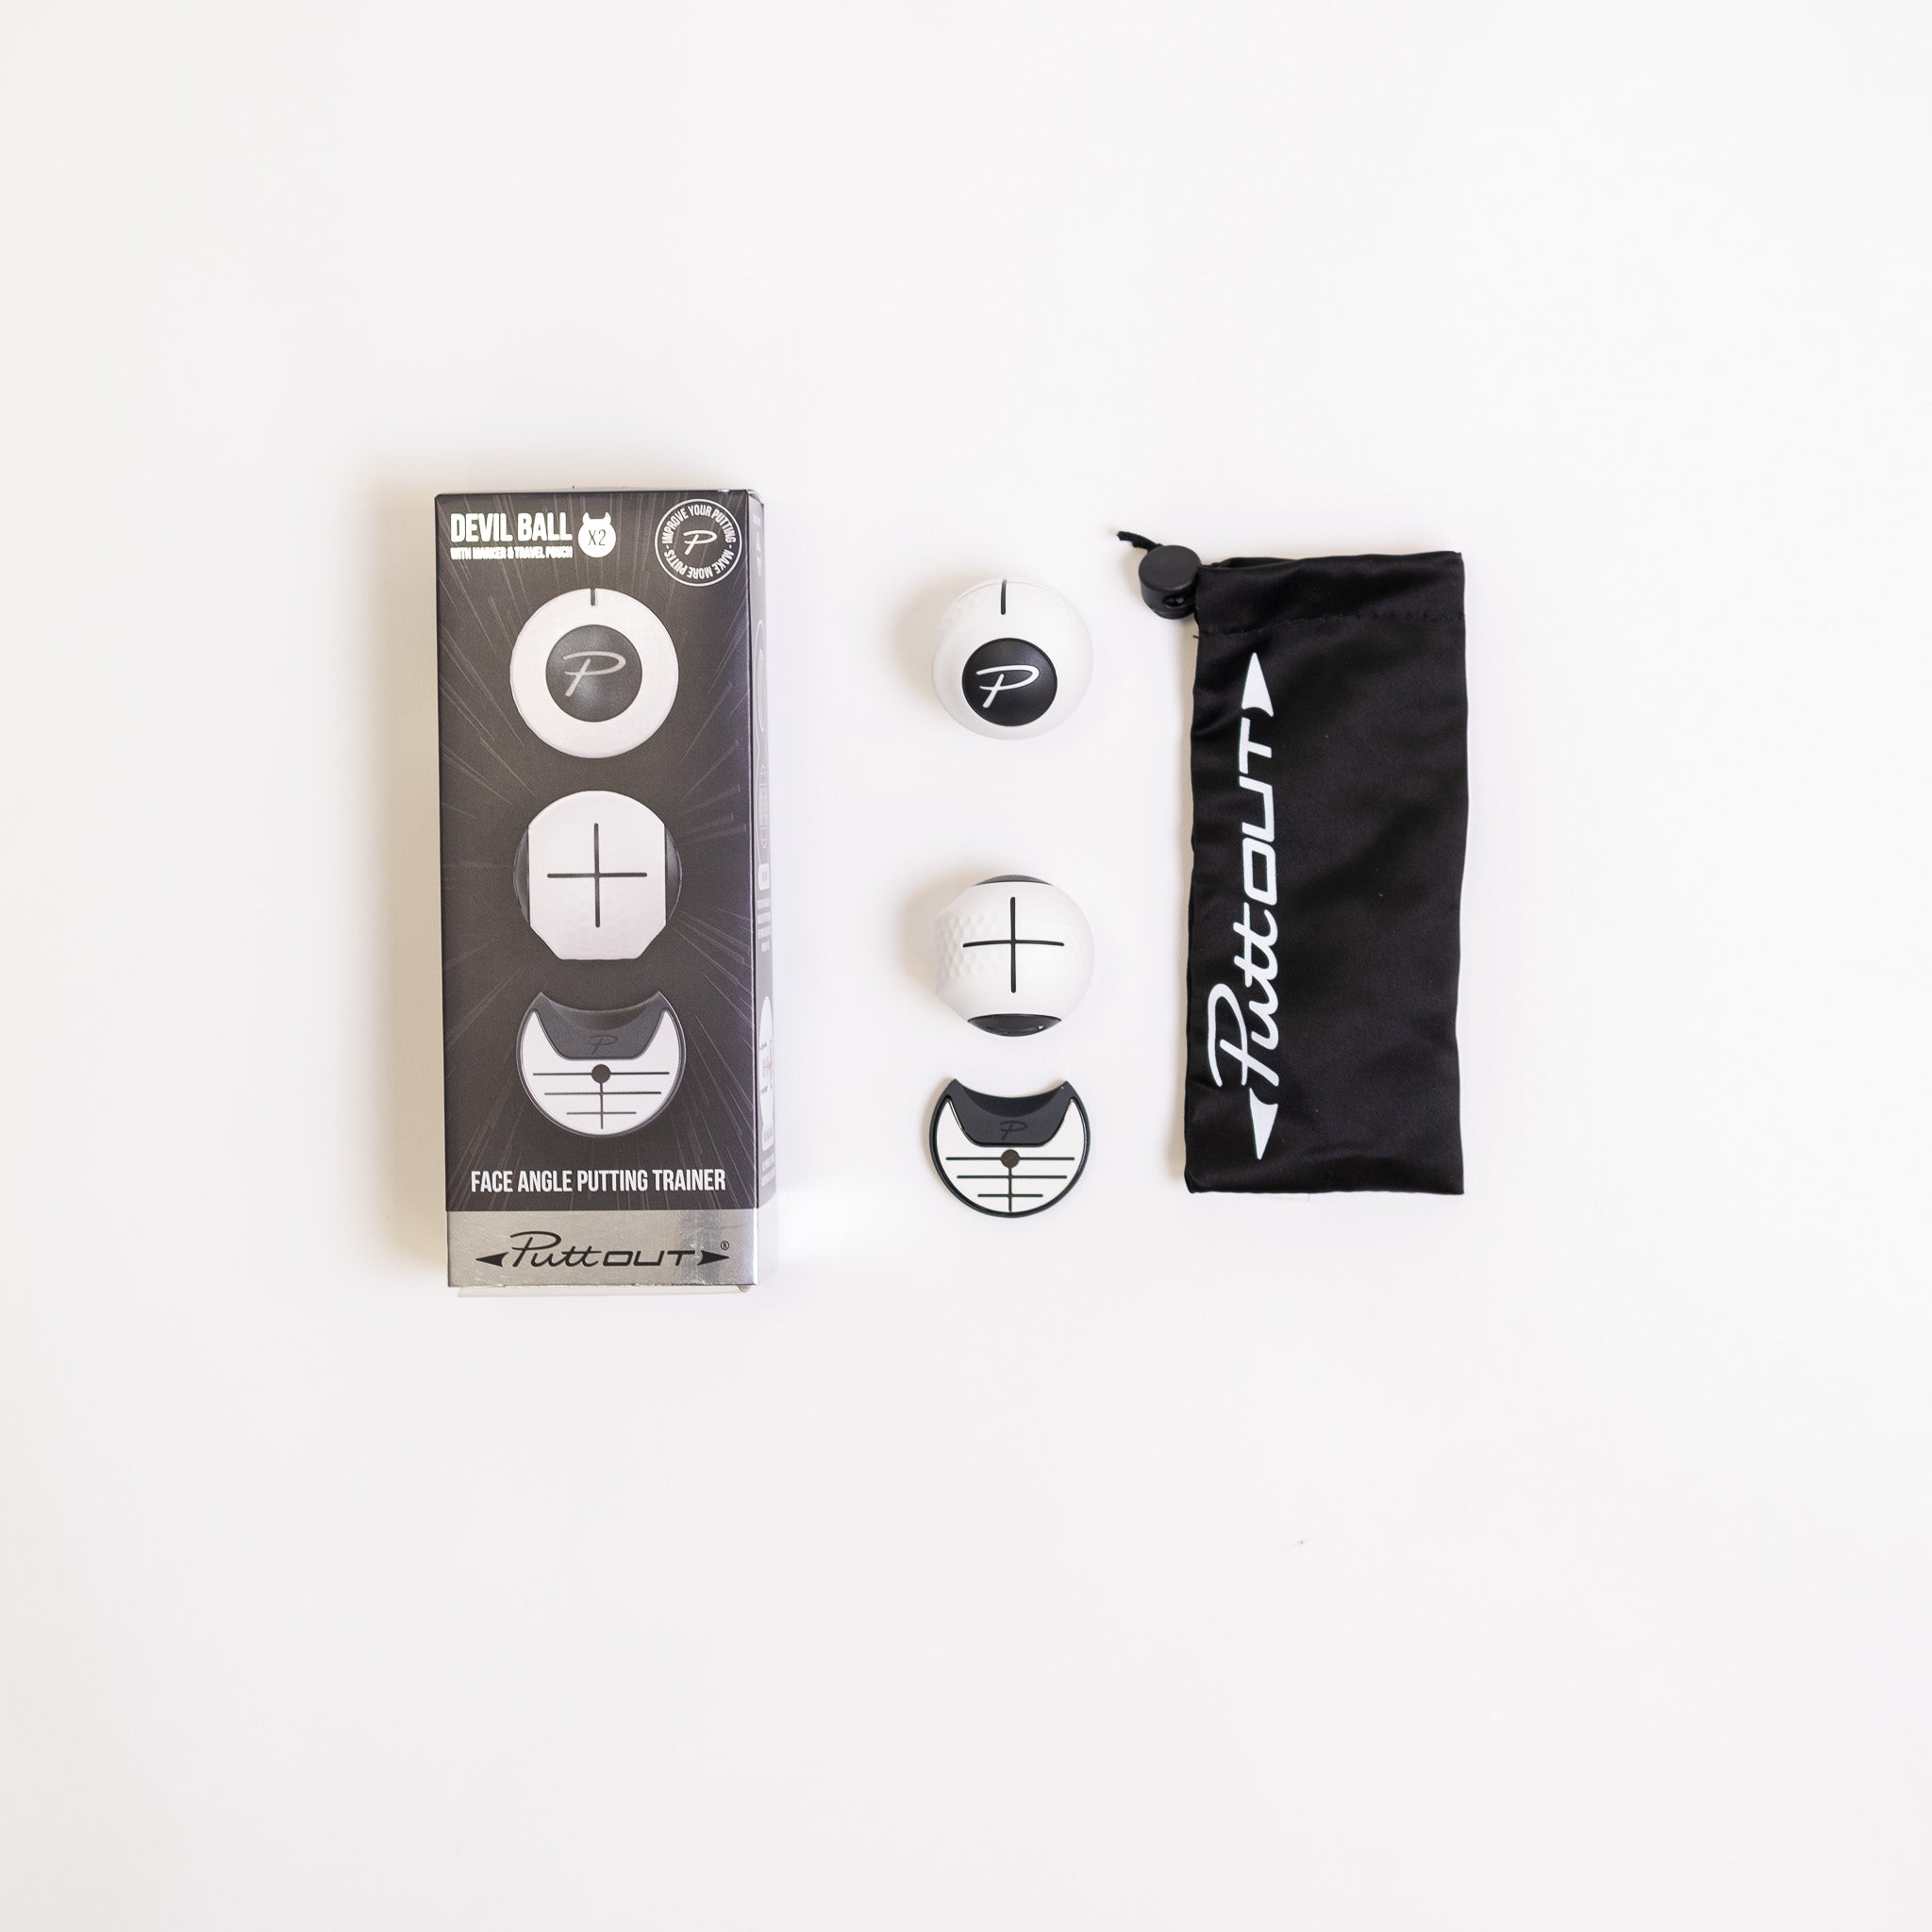
PuttOUT Putting Plane Alignment Stick Set Putting-specific training station including alignment sticks, an adjustable putting plane and gates. Golfers who want structured putting practice with a focus on stroke path and start line. Putting arc training, start-line gates, pace-control work and stroke-path refinement. The included sticks can also be used for general alignment, but the full set is optimised for putting. The Swing Plate Single-socket weighted base that holds alignment sticks at adjustable angles. Players who already own sticks and want to turn them into a proper full-swing training station. Plane training, swing-path rails, start-line gates, body-movement checkpoints, low-point and strike guides. Stable on mats, carpet and turf - ideal for home, range and simulator setups. The Swing Plate Dual Pro Dual-socket heavy base allowing two independently adjustable alignment sticks. Coaches, keen improvers and simulator users who build more complex practice stations. Dual plane/path rails, entry/exit gates, start-line and face-control gates, low-point and rotation checks. Heavier and more robust than the standard Swing Plate, ideal for slopes and extension-pole drills. Swing Plate – Official Alignment Sticks Pair of yellow alignment sticks designed by the Swing Plate team to work perfectly with their bases. Golfers who want a matched set of sticks to use with either Swing Plate unit. All alignment-stick drills including plane rails, path gates, start-line guides and full-swing stations. Standard alignment sticks that work both independently and as dedicated Swing Plate companions.   Instant Feedback at a Great Price: Golf Alignment Sticks In a market full of swing trainers, sensors and high-tech golfing gadgets, alignment sticks remain the quiet and consistent force that can drive honest improvement. They give you something a lot of the fancy gear can’t: instant feedback that sharpens your aim, tidies your setup, and keeps your swing travelling on the path you actually want - not the one you imagine. Use them right and you’ll build a setup that repeats, a swing that holds up under pressure, and a practice routine with purpose. Whether you’re rolling putts through a gate, dialling in ball position, or fine-tuning swing plane with a Swing Plate, two simple rods can transform the quality of every shot you hit. So keep it simple. The next time you’re tempted to blame your swing, drop a couple of sticks on the ground and let them tell you the truth. Your game will thank you for it. Explore our collection of golf alignment sticks here >
The GolfBays Putting Mat Buying Guide

September 26, 2025

By Malek Murison

Le guide d'achat du tapis de putting GolfBays

Vous voulez rentrer plus de putts ? Qui ne le voudrait pas ! Un tapis de putting est l’un des moyens les plus simples d’aiguiser votre coup sans mettre les pieds sur le parcours. Des tapis déroulables pour le couloir aux gazons premium pour baies simulateur, nos tapis offrent un vrai roulement, une vitesse réaliste et la possibilité de gagner en confiance sur des distances courtes à moyennes. Ce guide vous explique quoi rechercher, les différents types disponibles et nos meilleures recommandations pour vous aider à trouver le tapis de putting parfait pour votre espace et votre jeu. La pratique rend parfait : pourquoi acheter un tapis de putting ? Demandez à n’importe quel golfeur où se perdent le plus de coups et il vous dira (souvent avec un grand soupir) que c’est sur les greens. Les trois-putts, les doubles bogeys inutiles, les courts ratés ou le mauvais contrôle de la vitesse peuvent ruiner une partie plus vite qu’un drive mal maîtrisé. C’est pourquoi ajouter un tapis de putting à votre installation à la maison ou votre simulateur est l’un des moyens les plus simples de réduire vos coups. Un bon tapis de putting d’intérieur vous offre une surface au roulement fidèle, prête quand vous l’êtes. Pas besoin d’attendre le beau temps ou un green disponible. Vous pouvez répéter des exercices de ligne de départ dans le couloir, affiner votre contrôle de distance au bureau ou aménager une zone d’entraînement dédiée dans votre baie simulateur. Avec des options allant des tapis déroulables compacts aux gazons découpés sur mesure et aux greens modulaires intérieur/extérieur, il existe un tapis adapté à chaque espace et style de pratique. L’intérêt d’acheter un tapis de putting, c’est la constance. Chaque rouleau est le même, ce qui vous permet de vous concentrer sur la mécanique, la confiance et le ressenti. Avec le temps, vous développerez la mémoire musculaire pour des coups plus fluides, un meilleur contrôle de la vitesse et plus de putts réussis quand ça compte vraiment — sur le parcours. Quand vous investissez dans (et consacrez du temps de pratique à...) un tapis de putting, vous construisez une confiance issue du fait d’avoir rentré des centaines de putts de 6 pieds à l’entraînement. Cela enlève la pression pendant les vraies parties. Plus un putt vous semblera familier, moins vous aurez tendance à vous tendre et à faire une erreur.   Un aperçu rapide des tapis & gazons de putting recommandés par GolfBays Vous cherchez un tapis ou un gazon de putting pour vous entraîner à rentrer des putts sous pression à la maison ? Jetez un œil aux options ci-dessous... Produit Aperçu rapide GolfBays Premium Black Putting Turf Gazon noir à poils courts et vrai roulement, 13 mm de hauteur de poil découpé sur mesure pour des baies simulateur et pratiques à l’aspect épuré et sans joint. GolfBays Premium Roll-Out Return Putting Mat Tapis déroulable de 9 ft 6 in avec retour automatique de balle, deux tailles de trou, guides d’alignement et marqueurs 2/4/6/8 ft sur une surface rapide Stimp 10–14. GolfBays Modular Golf Putting Green (4 sizes) Green modulaire intérieur/extérieur à emboîtement avec gazon pré-découpé, trous réglementaires et plaques de contour, roulant ~Stimp 10 en quatre tailles disponibles. GolfBays Artificial Turf Two-Hole 150 × 350 cm Putting Green Green prêt à l’emploi 1.5 m × 3.5 m avec deux trous pour une mise en place rapide, des gestes répétables et un entraînement du taux de réussite à courte distance. GolfBays Putting Turf Gazon découpé sur mesure 11 mm de hauteur de poil, prix au m² — idéal pour des couloirs à vrai roulement quotidiens et l’intégration en baie simulateur. GolfBays Premium Putting Turf Gazon découpé sur mesure 16 mm de hauteur de poil, plus dense, offrant un roulement premium et réaliste pour des zones de putting dédiées. PuttOUT AirBreak Putting Mat Tapis d’entraînement aux breaks avec contours ajustables, retour de balle alimenté par batterie, prise en charge de l’app Green Reading et surface avec arrière en caoutchouc ~Stimp 10. Vitesse Stimp, expliquée Si vous avez déjà entendu des golfeurs parler de « Stimp », ils font référence à la vitesse des greens. C’est essentiellement la rapidité avec laquelle la balle roule après avoir été frappée. Le terme vient du Stimpmeter, un dispositif simple inventé dans les années 1930 qui mesure la distance parcourue par une balle sur une surface plane. Plus la balle roule loin, plus la lecture Stimp est élevée. Un Stimp de 8–9 donne l’impression d’un green lent et lourd. Un Stimp de 10–11 se rapproche de ce que vous trouverez dans la plupart des clubs bien entretenus. Stimp 12–14 correspond à la vitesse fulgurante que vous verrez en été et sur les circuits professionnels. En ce qui concerne les tapis de putting, la vitesse Stimp importe car elle vous permet d’adapter la pratique aux conditions que vous souhaitez simuler. Un tapis plus rapide vous aide à répéter le contrôle délicat de la vitesse pour des greens de type compétition. Un tapis plus lent peut être préférable pour travailler des frappes solides et éliminer la décélération. Dans les deux cas, connaître l’indice Stimp aide à choisir un tapis réaliste qui rend votre entraînement significatif. Comment choisir un tapis de putting : 4 questions pour vous aider à décider Il existe un grand nombre de tapis de putting et de gazons d’entraînement. Pour vous aider à réduire les options, parcourez les questions ci-dessous... Combien d’espace avez-vous / voulez-vous occuper ? Les tapis d’entraînement au putting existent dans toutes les formes et tailles, des couloirs déroulables aux installations occupant une pièce entière en passant par les compléments pour baie simulateur. Serez-vous satisfait d’une voie étroite pour des répétitions ou souhaitez-vous quelque chose de plus grand offrant plus de flexibilité et la possibilité de varier les exercices ? Quel roulement / quelle vitesse voulez-vous (Stimp) ? La plupart des tapis domestiques roulent autour de Stimp 9–11, certains surfaces plus rapides atteignant Stimp 14 pour reproduire des greens rapides d’été. Réfléchissez à la vitesse et au style que vous voulez travailler avant de choisir votre tapis de putting. Zone fixe ou portable ? Peut-être voulez-vous une zone d’entraînement dédiée pour votre simulateur. Peut-être préférez-vous un gazon découpé sur mesure pour s’adapter à un emplacement précis dans votre salle de loisirs ou votre espace de coaching. Ces options sont plus permanentes que les tapis déroulables ou les greens modulaires — qui peuvent être rangés et assemblés selon les besoins. Voulez-vous des fonctionnalités (retour de balle, breaks, multiples trous) ? C’est là que les tapis de putting commencent à se distinguer. Si vous visez le volume de répétitions, une voie simple ou un tapis avec retour de balle a du sens. Si vous voulez affiner votre lecture de green, cherchez des plaques de contour ou des tapis permettant de pratiquer les putts qui cassent. Et si vous voulez augmenter la pression, optez pour des tapis avec différentes tailles de trou — réglementaire pour le réalisme et plus petites pour travailler la précision sous pression. En fin de compte, le bon tapis de putting est celui qui correspond à votre espace, à vos objectifs et à votre façon de pratiquer. Si vous savez que vous l’utiliserez quotidiennement, investissez dans un gazon de meilleure qualité ou un tapis riche en fonctionnalités pour que l’entraînement reste motivant. Si vous cherchez seulement un outil rapide pour rouler quelques putts entre deux réunions Zoom, la portabilité et la simplicité peuvent être un meilleur choix. Tapis & gazons de putting recommandés par GolfBays Vous cherchez un tapis ou un gazon de putting pour vous entraîner à rentrer des putts sous pression à la maison ? Jetez un œil aux options ci-dessous... GolfBays Premium Black Putting Turf Si vous voulez une expérience de putting intérieure avec un toucher authentique, notre Premium Black Putting Turf répondra à vos attentes. Oui, il est noir plutôt que vert. Mais si vous allez putter sur un simulateur de golf ou vous entraîner à la maison, pourquoi ne pas choisir quelque chose d’un peu marquant ? Ce gazon de putting à poils courts et vrai roulement présente une finition noire élégante pour un look studio soigné. Il a une hauteur de poil de 13 mm et une largeur de 4 m, vendu découpé sur mesure, vous permettant de définir exactement l’emprise pour votre baie simulateur ou votre couloir de pratique sans joints disgracieux. Ce gazon est une manière simple d’ajouter une surface rapide et régulière qui a de la gueule et dure dans le temps. Idéal pour… Salles simulateur obscurcies et esthétiques studio épurées. Longueurs personnalisées (choisissez votre longueur) sans joints. Vitesse intérieure et exercices de ligne de départ toute l’année. Découvrez notre Premium Black Putting Turf > GolfBays Premium Roll-Out Return Putting Mat Si vous voulez un moyen simple et fluide de pratiquer votre putting à la maison, le GolfBays Premium Roll-Out Return Putting Mat devrait être en tête de votre liste. Il s’agit d’un tapis déroulable de 9 ft 6 in avec retour automatique de balle, deux tailles de trou (réglementaire + plus petit), guides d’alignement et marqueurs de distance 2/4/6/8 ft. Il comporte une légère montée pour la vitesse de fin de coup et une surface rapide (Stimp 10–14), ce qui vous permet d’affiner votre toucher sans aller au parcours. Idéal pour… Répétitions rapides et de haute qualité entre deux réunions. Contrôle de la vitesse et pratique de la ligne de départ dans des espaces restreints. Solution de putting à domicile complète et prête à offrir. Commandez votre Roll-Out Return Putting Mat > GolfBays Modular Golf Putting Green Notre green modulaire est une solution portable et emboîtable que vous pouvez monter en quelques minutes et utiliser à l’intérieur comme à l’extérieur. Il est livré avec gazon pré-découpé, trous réglementaires et plaques de contour, et roule à environ Stimp 10 pour vous aider à régler un contrôle de vitesse réaliste. Choisissez parmi quatre tailles, créez un léger break et obtenez de vraies répétitions d’entraînement sans abîmer le salon. Idéal pour… Locataires ou familles (montage rapide, rangement facile). Contrôle de la vitesse et exercices de ligne de départ avec légers breaks. Entraînement au jardin, dans le garage ou dans une pièce dédiée. Procurez-vous un Modular Green > GolfBays Artificial Turf Two-Hole Putting Green Notre green deux-trous offre un toucher réaliste sur une petite surface dédiée qui s’installe rapidement pour des frappes répétables, des exercices de ligne de départ et pour finir depuis ces derniers pieds stressants. Idéal pour… Une voie d’entraînement fixe dans une pièce ou un bureau. Entraînement du taux de réussite à courte distance avec deux cibles. Joueurs qui veulent une installation sans prise de tête et un roulement constant. Procurez-vous votre Two-Hole Putting Green > GolfBays Putting Turf Notre surface découpée sur mesure la plus accessible a une hauteur de poil de 11mm. Ce gazon de putting est disponible en différentes tailles et vendu au mètre carré, vous permettant de construire exactement le green d’entraînement dont vous avez besoin. Nous avons développé ce gazon pour offrir un excellent roulement quotidien pour les portes de départ, les échelles de distance et pour intégrer une bande de putting à côté d’un tapis de frappe dans une baie simulateur. Idéal pour… Installations personnalisées économiques. Longs couloirs d’entraînement droits dans les simulateurs ou les couloirs. Roulement intérieur constant pour des répétitions quotidiennes. Commandez le vôtre ici > GolfBays Premium Putting Turf Pour une sensation vraiment réaliste sur votre propre green d’entraînement, notre gazon premium a une hauteur de poil de 16 mm et se décline en plusieurs longueurs et largeurs. La construction plus dense offre un roulement plus premium et fidèle sous le pied, idéal pour des zones de putting dédiées ou quand vous voulez une finition haut de gamme assortie au reste de votre salle simulateur. Idéal pour… Installations simulateur haut de gamme et studios de coaching. Joueurs qui souhaitent une sensation un peu plus moelleuse et plus fidèle. Installations sur mesure sans joints visibles. Procurez-vous votre Premium Putting Turf > PuttOUT AirBreak Putting Mat Le PuttOUT AirBreak est un tapis de putting doté d’un système astucieux d’entraînement aux breaks. Vous pouvez pratiquer des putts qui cassent de manière réaliste à domicile en relevant ou abaissant la base flexible, chaque putt réussi étant renvoyé par un retour de balle alimenté par batterie. Vous pouvez tester des centaines de combinaisons de breaks personnalisées et utiliser l’application Green Reading associée pour vous aider à configurer et à vous entraîner. La cup 4.25" offre des lip-ins/outs réalistes, et le tapis à dos caoutchouc roule autour de Stimp 10. Idéal pour… Développer la lecture des greens avec des breaks contrôlés. Installations domestiques compactes nécessitant retour automatique et rangement soigné. Putteurs sérieux qui aiment les sessions structurées et les données. Procurez-vous le AirBreak Putting Mat > FAQ sur les tapis de putting Q : Les tapis de putting en valent-ils la peine pour les golfeurs ?Absolument. Un tapis de putting fournit une surface au vrai roulement à la maison, vous permettant de pratiquer la ligne de départ, le contrôle de la vitesse et les courts putts quand vous le souhaitez. La capacité de répéter des exercices quotidiennement — sans dépendre de la météo ou d’un trajet jusqu’au parcours — fait des tapis de putting l’un des moyens les plus rapides de réduire votre score. Q : Quel est le meilleur tapis de putting pour les petits espaces ?Si vous n’avez qu’un couloir, un bureau ou un salon, un tapis déroulable avec retour de balle est parfait. Ils sont compacts, rapides à installer et permettent d’enchaîner des répétitions de qualité dans des espaces restreints. Des options comme le GolfBays Premium Roll-Out Return Mat sont conçues pour des séances fréquentes et courtes. Q : À quel point les tapis de putting d’intérieur sont-ils réalistes comparés à un green de golf ?Les tapis de haute qualité reproduisent la vitesse Stimp des vrais greens — la plupart roulent autour de Stimp 9–11, les modèles premium atteignant Stimp 13–14 pour imiter des surfaces rapides d’été. Les greens modulaires et les gazons premium proposent également des plaques de contour ou plusieurs trous pour une expérience d’entraînement plus réaliste. Q : Quelle est la différence entre le gazon de putting et un tapis déroulable ? Les tapis déroulables sont portables, faciles à ranger et possèdent souvent des guides d’alignement ou un retour automatique. Ils conviennent bien à la pratique occasionnelle. Le gazon découpé sur mesure est plus permanent et offre une surface de qualité studio, intégrable dans une baie simulateur ou une salle dédiée. Les greens modulaires combinent réalisme et flexibilité, vous permettant de créer une zone d’entraînement plus vaste avec des breaks et plusieurs trous. Q : Comment choisir le bon tapis de putting pour mon jeu ?Commencez par l’espace dont vous disposez (couloir vs pièce dédiée vs baie simulateur), puis décidez si vous voulez de la portabilité ou une installation plus permanente. Réfléchissez à la vitesse Stimp sur laquelle vous souhaitez vous entraîner et si vous bénéficieriez de fonctionnalités comme le retour de balle, l’entraînement aux breaks ou des trous réduits pour un défi supplémentaire. Q : Un tapis de putting peut-il vraiment m’aider à rentrer plus de putts sur le parcours ?Oui — parce que la pratique construit la mémoire musculaire. Quand vous aurez rentré des centaines de putts de 6 pieds sur votre tapis, le même putt sur le parcours paraîtra familier plutôt que sous pression. La constance du roulement et du geste renforce la confiance, ce qui est le facteur principal pour réussir davantage de putts au moment crucial.
The Best Golf Swing Training Aids in 2025: What Works?

September 26, 2025

By Malek Murison

Les meilleurs aides d'entraînement pour le swing de golf en 2025 : qu'est-ce qui fonctionne ?

Si vous voulez améliorer votre swing de golf, vous avez besoin d’aides à l’entraînement qui offrent un retour clair et peuvent être utilisées pour des exercices répétables — pas de gadgets en plastique qui prennent la poussière pendant que votre jeu stagne. Dans ce guide, nous passons en revue les meilleurs accessoires d’entraînement au golf, notamment les entraîneurs de swing, les entraîneurs de grip, les outils d’entraînement au putting et le matériel général de pratique du golf. Tout ce qui suit est recommandé par notre équipe pour porter votre swing de golf au niveau supérieur. Allons-y. Tableau récapitulatif rapide : Aides à l’entraînement du swing de golf Aide à la pratique Objectif Lien Aide d’entraînement Visio T-Line Affûte votre perception de la rectitude, de l’alignement du visage et de la ligne de départ. Voir le produit Carte Power Shift Entraîne un bon timing du transfert de poids avec un retour audio. Voir le produit Radar de vitesse de swing de golf Le radar Doppler fournit instantanément la vitesse de tête de club — aucune balle requise. Voir le produit Miroir de putting Visio (acier) Vérifie la ligne des yeux, la ligne des épaules et la face du putter. Voir le produit Visio Putting Laser & Trépied Projette une ligne de visée visible, en intérieur comme en extérieur, pour calibrer le putt. Voir le produit La plaque pivotante Transforme des bâtons d’alignement en un laboratoire de swing pour des exercices de plan, de trajectoire et de rotation. Voir le produit La plaque Swing Plate Dual Pro Deux supports pour des couloirs avancés d’avion et de trajectoire, plus de stabilité. Voir le produit SwingPlate Putting Gate Portes réglables (50mm/55mm) pour la ligne de départ et l’entraînement au roulage. Voir le produit La Divot Board ` La planche brevetée change de couleur pour afficher l'impact, le point bas et la trajectoire de swing. Voir le produit Grip It Rite Training Grip Guide automatiquement vos doigts vers une prise neutre, sûre et approuvée par les professionnels. Voir le produit Comment choisir l’aide d’entraînement de golf adaptée Préparation des commandes équipement d’entraînement n’est pas une question d’acheter le gadget le plus tape-à-l’œil. Bien que, c’est vrai, c’est assez amusant aussi. Il s’agit de trouver des outils qui vous donnent un retour impossible à ignorer et des habitudes qui tiennent vraiment. Un bon entraîneur de swing devrait faire plus que vous occuper et sentiment productif à propos de votre jeu. Cela devrait vous montrer pourquoi un coup a mal tourné et vous aide à ressentir la correction. Pour commencer, recherchez toujours des supports de formation qui : Fournissez un retour immédiat et facile à comprendre. Si vous vous demandez ce qui s’est passé, c’est que l’aide ne fait pas son travail ! Construisez des fondamentaux reproductibles. De la prise à la posture en passant par le contact, le bon outil ancre des habitudes sur lesquelles vous pouvez compter sous pression. Développer la mémoire musculaire est essentiel. Encouragez des répétitions sûres et efficaces. Vous devriez pouvoir vous entraîner à l’intérieur, au stand ou dans le jardin sans risquer d’endommager votre corps (ni vos meubles). Recherchez des aides d’entraînement que vous pouvez utiliser en toute sécurité pour vos exercices, jour après jour. Transférer vers le cours. Les aides d’entraînement doivent réduire l’écart entre la pratique et la performance, pas créer de nouvelles béquilles. Vous recherchez de petits ajustements techniques que vous pouvez emporter avec vous et utiliser quand cela compte vraiment. Les entraîneurs de swing de golf et autres aides à l’entraînement sont un peu comme les fondations d’une pyramide. Vous commencez par le retour d’information et vous maîtrisez les bases (grip, contact, ligne de départ), puis vous ajoutez des guides qui aident à façonner la trajectoire de balle et à affiner les plus petits détails. Le bon mélange signifie moins de swings gâchés, plus de moments « aha » et de vrais progrès qui se voient là où ça compte — sur la carte de score ! GolfBays recommande ces entraîneurs de swing de golf Voici quelques-uns de nos entraîneurs de swing de golf préférés pour vous aider à maîtriser vos coups du départ jusqu'au green. Aide d’entraînement Visio T-Line T-Line de Visio est un outil de putting d’une simplicité trompeuse qui excelle dans trois domaines : il affine votre perception de ce que « parfaitement droit » signifie vraiment, il corrige l’alignement de la face, et il vérifie si vous pouvez réellement lancer la balle sur la ligne que vous visez. Posez-le, réussissez vos coups et vous obtiendrez un retour immédiat et honnête sur l’orientation de vos yeux et de la face du putter par rapport à l’endroit où vous penser ils pointent. C’est une simple réalité qui peut vous aider à vous adapter et à économiser des coups, sans avoir besoin d’un launch monitor (ou d’un doctorat). Sa taille pratique lui permet de tenir dans votre sac d’entraînement et offre une longue ligne de visée linéaire avec des repères perpendiculaires pour l’angle de face, afin que vous puissiez travailler la visée et la ligne de départ sur des putts de n’importe quelle longueur. Pourquoi c’est un excellent outil d’entraînement Entraîne une perception « droite » authentique Retour sur l’angle du visage et la ligne de départ en secondes Compacte et robuste, elle se glisse facilement dans un sac pour le stand de tir ou une installation à domicile Conçu par Visio et utilisé par des entraîneurs de niveau tournoi Carte de distribution d’alimentation Un swing parfait repose entièrement sur la répartition du poids. Le Tableau de distribution d’énergie vous apprend à appliquer et relâcher la pression au bon moment avec un déclic net et audible qui devient votre métronome pour une meilleure séquence de swing. Avec de la pratique, vous apprendrez à synchroniser le chargement et le déchargement de la pression d’une jambe à l’autre, obtenant plus de puissance grâce à un meilleur timing ainsi, vous commencerez à swinguer davantage comme un pro et moins comme un amateur. La Power Shift Board est légère, portable et prête à l’emploi pour des répétitions au garage, des sessions au practice et des réglages avant le parcours. Les pointes sur la base la maintiennent bien en place, et le cliquet fournit un retour immédiat qui ne laisse aucune place au doute. Des swings plus rapides et plus efficaces commencent à partir du sol. Pourquoi c’est un excellent outil d’entraînement Un « clic » audible cloue le timing de votre changement de pression. Séquençage des trains pour la vitesse et précision. Fonctionne sur la plupart des surfaces et est conçu pour une pratique fréquente. Idéal pour les swings complets et les variations de petit jeu. Radar de vitesse de swing de golf Vous voulez des statistiques de vitesse sans approximations ? Ce Radar de vitesse de swing de golf est un système Doppler compact qui affiche instantanément la vitesse de votre tête de club, sans autocollants ni accessoires à fixer au club. Vous n’avez même pas besoin de frapper une balle. Posez-le, swignez, vérifiez l’appareil et suivez vos progrès répétition après répétition. C’est une façon simple et fiable de ludifier l’entraînement à la vitesse et de mesurer l’essentiel — ou d’ajuster votre rythme de swing idéal et de trouver le juste milieu entre vitesse et constance. Les entraîneurs apprécient cet appareil car il fournit un retour immédiat. Les joueurs l’adorent parce qu’il les tient responsables et simplifie le suivi des progrès d’un indicateur très important ! Pourquoi c’est un excellent outil d’entraînement De véritables relevés Doppler — aucun tag de club ni balle requis. Retour de vitesse immédiat pour orienter les charges d’entraînement. Portable, écran LCD, commutation mph/km/h. Prouvé par des entraîneurs et utilisé dans tous les sports. Miroir de putting Visio (Édition acier) Si vous êtes à la recherche d’une aide d’entraînement au putting, le Miroir de putting Steel Visio offre une vue claire et sans distorsion de l’alignement des épaules, de la position des yeux et de la face du putter à l’adresse. Elle vous montre également comment ceux-ci évoluent pendant le mouvement. Des encoches vous permettent de créer de simples exercices de “portique” pour l’impact et la trajectoire, et les repères d’alignement rendent la mise en place reproductible. Son poids et sa construction en acier le maintiennent bien en place et le rendent durable, idéal pour le green d’entraînement, le studio ou la chambre d’ami. Si vous voulez un roulement régulier, commencez par une configuration régulière. Ce miroir transforme « Je ressentir carré” en “Je am carré.” Pourquoi c’est une excellente aide d’entraînement Vérifie en un coup d’œil la ligne des yeux, la ligne des épaules et l’angle du visage. Encochettes intégrées pour les tees afin de créer des portes de frappe et de trajectoire. Structure en acier = stable, durable, sensation haut de gamme. Conçu par Visio pour des fondamentaux éprouvés en tournoi. Visio Putting Laser & Trépied La visée fait tout, et ce aide au putting laser le rend plus visible que jamais. Le Visio Laser projette une ligne précise pour révéler où vous visez réellement, que ce soit sur des putts droits ou à effet. Vous pouvez utiliser le trépied avec la jambe pare-chocs pour refléter sur un panneau de rebond en intérieur, ou retirer la jambe et tracer directement la ligne de visée sur le green en extérieur — le faisceau est suffisamment puissant pour que vous n’ayez pas besoin d’un panneau cible. Cet outil est idéal pour entraîner votre œil, et même pour les coachs qui alignent des systèmes d’analyse. Pourquoi c’est un excellent outil d’entraînement Vise avec précision les putts droits et les putts avec courbe. Mode réflecteur intérieur ou mode extérieur « suivre la ligne ». Rechargeable, monté sur trépied, marche/arrêt en continu. Conception Visio fiable pour l’étalonnage visuel. La plaque pivotante Le Plaque oscillante prend de simples baguettes d’alignement et les transforme en un véritable laboratoire de swing de précision. Réglez l’angle de la baguette à la main et, en un rien de temps, vous pouvez créer des exercices pour le démarrage du club, le plan, le chemin, la rotation, et même le mouvement de la tête (avec une perche d’extension). Compact, fabriqué au Royaume-Uni, et utilisé par les meilleurs coachs, il convient aux simulateurs, tapis, au practice ou même au jardin. Avec cet outil, vous pouvez développer rapidement la mémoire musculaire pour une géométrie de swing correcte. \Pourquoi c’est une excellente aide à l’entraînement Entièrement réglable à la main ; compatible droitier/gaucher ; toute surface. Des dizaines de forets pour plan, trajectoire, rotation et plus encore. Portable, approuvé par les entraîneurs, fabriqué au Royaume-Uni. Accès à une vidéothèque inclus pour accélérer les progrès de la pratique. La Swing Plate Dual Pro Le Plaque Swing Dual Pro reprend l’idée originale et ajoute un deuxième support articulé, afin que vous puissiez construire des « rails » parallèles ou des couloirs à angles mixtes et travailler sur un entraînement plus avancé des plans et des trajectoires. C’est une base plus lourde et plus robuste, appréciée par de nombreux entraîneurs, idéale sur les pentes ou avec des perches d’extension, et qui permet une grande variété d’exercices de swing complet, de chip, et même de putting. Pourquoi c’est un excellent outil d’entraînement Deux supports à tige réglables = des couloirs d’avion/de passage instantanés. Base plus lourde et plus stable, idéale pour l’entraînement ou les pentes. Compatible avec les bâtons d’alignement et les perches d’extension. Toutes les utilisations de la plaque Standard Swing, plus d’autres configurations. SwingPlate Portique de putting Ajoutez un entraînement de ligne de départ parfaitement rectiligne à votre Swing Plate avec le SwingPlate Putting Gate. Cet outil vous permet de régler des largeurs de « porte » précises (avec des indicateurs de largeur de trou) pour entraîner un roulement plus pur. Il est universel avec les bâtons d’alignement, simple à installer et donne accès à la bibliothèque de coaching en ligne de SwingPlate pour des idées d’exercices. Deux tailles de porte (50mm/55mm) mettent à l’épreuve la qualité de votre swing : manquez la porte et vous saurez que votre face ou votre trajectoire était décalée. Compact, pratique à glisser dans un sac, et un ajout évident si vous aimez déjà votre Swing Plate. Pourquoi c’est un excellent outil d’entraînement Ligne de départ à composer avec largeurs de portail réglables. Indicateurs de largeur de trou pour un ciblage réaliste. S’adapte à toute base Swing Plate ; fonctionne sur n’importe quelle surface. Comprend l'accès aux exercices dans la bibliothèque de coaching en ligne. La planche à divots Le Planche à divots est aujourd’hui une aide au swing de golf désormais célèbre qui fournit un retour instantané sur votre contact avec le sol, le point le plus bas, la trajectoire et l’emplacement de l’impact. Le meilleur, c’est qu’elle peut être utilisée partout où vous pouvez balancer un club. La surface d’impact change de couleur au point de contact afin que vous puissiez voir où le club a été en contact par rapport à l’image de la balle. Ajustez simplement jusqu’à ce que votre schéma soit constamment balle puis gazon, avec une frappe centrée. C’est simple, addictif et d’une honnêteté brutale. Profil bas, portable et conçu pour rester en place sur les tapis, la moquette ou l’herbe grâce à de petites aspérités en dessous, la planche intègre une technologie brevetée dont les coachs raffolent. Cet accessoire d’entraînement au golf éliminera les approximations de votre pratique et accélérera vos progrès. Pourquoi c’est un excellent outil d’entraînement Affiche instantanément le point le plus bas et le motif de frappe. Entraîne un contact balle puis gazon pour des fers nets. Fonctionne en intérieur/extérieur ; base profil bas et adhérente. Conception éprouvée et brevetée utilisée par les entraîneurs. Poignée d’entraînement Grip It Rite Votre prise est la seule connexion que vous avez avec le club, donc si elle est mauvaise, tout le reste sera une bataille difficile. Le Poignée d’entraînement Grip It Rite rend le placement correct des mains automatique. Glissez-le sur votre club et les contours moulés guident vos doigts et vos pouces vers la position neutre, éprouvée sur le circuit, à chaque fois. Pas de tâtonnements, pas de mauvaises habitudes qui s’installent — juste une prise répétable et exemplaire sur le club. Plus vous vous entraînez avec, plus une prise correcte devient une seconde nature. Pourquoi c’est un excellent outil d’entraînement Apprend instantanément le bon placement des mains et la pression adéquate. Évite les défauts de prise et les blessures qui en résultent ! Développe une mémoire musculaire répétable pour un meilleur contrôle et une plus grande constance. S’adapte facilement à la plupart des clubs pour s’entraîner partout. Léger et durable - idéal pour l’entraînement à long terme. FAQ sur l’entraînement du swing de golf Q : Qu’est-ce qui fait un bon accessoire d’entraînement au golf ?Un bon entraîneur devrait vous donner un retour impossible à ignorer et vous aider ressentir la solution. Recherchez quelque chose qui offre un retour instantané, développe des fondamentaux reproductibles et se transpose sans effort sur le parcours. Notre gamme complète de accessoires d’entraînement de golf sont conçus en tenant compte de ces qualités. Q : Comment puis-je améliorer mon plan de swing à la maison ?Les baguettes d’alignement sont l’outil le plus polyvalent au golf, surtout lorsqu’elles sont associées à La plaque oscillante. Il maintient vos bâtons à des angles réglables, afin que vous puissiez travailler les takeaways, les mouvements d’aplatissement ou les lignes de départ sans avoir besoin de gazon pour y enfoncer des bâtons. Pour des exercices plus avancés, le Plaque à double oscillation Pro ajoute un second support pour des « rails » instantanés. Q : Quelle est la meilleure façon de corriger des frappes de balle irrégulières ?Vous pourriez avoir besoin de commentaires sur l’endroit où le club entre en contact avec le sol. Le Planche à divots indique l’emplacement de l’impact, la trajectoire et le point le plus bas avec une honnêteté implacable — aucune excuse, juste un retour clair que vous pouvez ajuster d’un swing à l’autre. Q : Ai-je vraiment besoin d’un entraîneur de prise ?Absolument. Votre prise est la seule connexion que vous avez avec le club. Si elle est mauvaise, tout le reste devient plus difficile. Le Poignée d’entraînement Grip It Rite rend le bon placement des mains automatique, afin que vous intégriez un placement des mains neutre et techniquement correct sans même y penser. Q : Comment puis-je travailler le transfert de poids et la puissance ?Le bon timing de votre changement de pression est essentiel. Le Carte Power Shift vous entraîne à charger et à relâcher la pression au sol au bon moment avec un « clic » audible. C’est un retour de séquençage instantané, essentiel pour gagner en vitesse sans perdre le contrôle. Q : Quelle est une façon simple de mesurer la vitesse de swing ?Le Radar de vitesse de swing de golf est compact, précis et ne nécessite aucun accessoire spécial. Posez-le, balancez, et obtenez instantanément un retour sur la vitesse de tête de club. Utilisez-le pour suivre vos progrès ou pour gamifier vos séances de vitesse. Q : Les accessoires d’entraînement au putting en valent-ils la peine ?100 %. Beaucoup de coups importants se jouent sur le green, et de petites améliorations à cet endroit vous feront gagner des coups. Des outils comme le Miroir d’entraînement Visio Putting (vérifie l’alignement et le trait) et le Porte de putting SwingPlate (le départ des forages) vous aide à construire un enroulement cohérent. Pour l’étalonnage de la visée, le ///Laser de putting Visio rend les tirs mal dirigés impossibles à ignorer. Q : Comment savoir avec quel modèle commencer ?Imaginez cela comme la construction d’une pyramide. Commencez par les fondamentaux : prise, contact et ligne de départ. Ajoutez ensuite des outils pour la séquence, la vitesse et le contrôle de la trajectoire de balle. Découvrez notre collection complète de entraîneurs de swing de golf pour créer votre propre boîte à outils d’entraînement.
GolfBays

Solid net suffisamment solide pour pratiquer le driver et tous les autres clubs du sac. La pente de retour est très pratique et vous évite de ramasser les balles, elles roulent directement jusqu'à vos pieds. Je recommande également d'acheter des ancrages au sol ou des piquets robustes pour la fixer si elle est utilisée dans le jardin.

Liam

J'avais déjà une grande salle de sport chez moi, mais je voulais aussi commencer à m'entraîner au golf à la maison tout en améliorant ma condition physique. Je ne voulais pas d'option encastrée, donc l'enceinte simbox était la solution parfaite. Elle m'a permis de la placer où je le souhaitais dans ma pièce, ce qui était un avantage car je ne pouvais pas la mettre contre un mur. La qualité du simbox est incomparable ; j'ai choisi l'écran Close Knit Baffle car je voulais l'écran le plus résistant pour la quantité d'entraînement que je fais, et il est aussi très silencieux, ce qui est appréciable. Je ne remercierai jamais assez l'équipe de Golfbays, tous les gars sont très compétents, on voit bien qu'ils ont tous un passé de golfeurs. Je le recommanderais sans hésiter.

H.P.

Qualité fantastique, facile à installer et livraison rapide. On ne pouvait pas demander mieux. Nous avons également acheté un projecteur et un boîtier de protection qui sont brillants. Crée une installation d'apparence très professionnelle.

Luke M.

Le mauvais temps ne me pose plus de problème, je peux être dans mon garage et au 7th à Augusta en même temps !

B Edwards

La boîte a été livrée très rapidement, y compris le dédouanement, parfait. La SimBox a dépassé mes attentes, la protection de la boule noire est très insonorisante, Impact Screen Pro+ est très bien pour la Full HD. Grâce au tutoriel vidéo, elle peut aussi être installée seul, mais c’est beaucoup plus détendu à deux. Simplement parfaite, fortement recommandée, grâce aux 6 tailles il y a toujours une place à la maison, tant que la hauteur de la pièce convient. Qualité très convaincante. En bref : brillante pour le simulateur à domicile.

Markus K.

Grande qualité, facile à assembler, je frappais des balles quelques heures après la livraison, qui est arrivée sous 48 heures. Il manque quelques articles pour compléter la pièce parfaite. J'achèterai de nouveau.

Mark W

Facile et rapide à configurer. Quelques problèmes mineurs avec le logiciel, mais facilement résolus par un appel rapide à l'équipe de golfbays. Je recommande TGC2019 pour le jeu. Je n'ai pas essayé les parcours de Skytrak, mais je pense qu'ils sont bons.

Pierre H

Satisfait(e) de la qualité du gazon et le recommanderais vivement à d'autres.

Scott W

Ceci est une machine exceptionnelle, avec une livraison rapide et un service client remarquable de Golf Bays. C’est mon deuxième achat chez Golf Bays, ils obtiennent d'excellentes notes à chaque fois et je le recommande vivement !

Jonathan

Je viens d'installer ce nouvel écran Pro+ sur mon simulateur de golf commercial. La différence entre l'ancien et celui-ci est impressionnante. Non seulement il est beaucoup plus silencieux, mais la projection d'image est bien plus nette. Il est installé assez fermement à l'aide des boules élastiques (bungee balls) et il n'y a pas de rebond significatif. Je recommande sans réserve l'écran d'impact Pro+.

Adam S.

L'équipe de golf aime s'entraîner avec le tapis d'entraînement Puttout. Plus de pratique signifie de meilleurs putts sur le parcours. La qualité du produit est excellente.

Boliver

DÉCOUVREZ NOS MEILLEURES VENTES